Pre-Mission Setup
I roll a rescue mission. If I had any troops that had been captured by the enemy it would allow me to liberate them, but since I don't, it's going to be an 'allies in trouble' mission. I roll up the forces that are being rescued and come up with 4 unarmed civilians. A news crew in trouble.
Since I had a major victory in the last battle, I have a few extra assets that I can spend for this month. I request a sniper team, a VTOL Gunship and a Medivac Airship in case things get hairy. I'm would have liked a Forward Observer team and heavy artillery as well, but it's probably best that I'm not throwing around heavy artillery danger close to unarmed civilians. Hopefully the sniper team can make up for it.
I decide to bring Second and Third squads, as well as the Lt. and Mechanical Mule. I debate about bringing the medic on this one, but I don't want to over fatigue him, the Medivac airship should keep me covered for any mass casualty event, and I'll be relying on overwhelming force of numbers to sweep the field.
Of course, all this planning can go out the window in a heartbeat, and as I roll an ambush, it does.
Showing posts with label AAR. Show all posts
Showing posts with label AAR. Show all posts
Thursday, April 16, 2015


Tuesday, April 14, 2015
Lenkova Campaign - Mission 1
Pre-Mission Setup
So for the first mission of the campaign I roll up a Terminate mission. Pretty straightforward, I also roll a 2 on the monthly assets, not much since it's still the first round, but enough to purchase a UAV that can identify some unknown contacts.
I select one of my squads to go on the mission, with the Platoon Sgt.in command and the medic attached in case of casualties. No need to fatigue everyone in the first round, if they run into anything that they can't handle then I can send reinforcements in the form of the Quick Reaction Force. What bothers me is that I won't have any air or heavy artillery support for this operation, although I should be able to call on the company mortars if things get hairy. Anticipating the possibility of close quarters, I also rearm one of the riflemen with a combat shotgun.
Now comes the part where I need to cross fingers, rolling for ambush. One of the features of the Year in the Valley system is that based on your Popular Opinion you have a chance to be ambushed or even attacked at your base of operations. Fortunately for me, I rolled low and avoided that for this turn.
Next I roll up the location according to the Terminate scenario.
Hills - Water - Water
Hills - Building - Hills
Rough - Open - Hills
So it's a small valley opening up on one side to a water source, possibly a lake house that has been converted to a command center. Or the vacation mansion of a crime lord. I imagine that there's probably a roadway on that one open sector, and with this much water and hills, I'm going to say that the rough area is covered with trees and thickets. (Note: each grid square translates to about 2 inches across on table)

A Year In The Valley Colonies - Lenkova Campaign Prelude
This new series is going to be a log of a campaign that I'm going to be running using my Year in the Valley campaign system, adapted slightly to a sci-fi setting as a little preview of the sci-fi supplement that I've been working on for the Fireteam to Fireforce system. The counter-insurgency aspect won't show off all of the cool things I've been working on, but there are a few cool items that I've tried to include and it's going to be in the back of my mind to try and include more teasers for what the still to be named sci-fi expansion will have in store.
I've also used the excellent free nation generator by Nordic Weasel Games with a few slight adaptations to add a little background to the conflict.
Planetary Intelligence Report
3rd Platoon, 'Tramplers' - Lt. Valle commanding, Sgt. Sanchez 2ic
Organized into 3 squads of 12 men in 3 fireteams each, along with an HQ element which includes the LT. the Platoon Sgt, and a Mechanical Mule. In addition, a medic has been attached directly to the platoon(bought with asset points) for the duration of their rotation on Lenkova.
Platoon Armory
In addition to the standard assault rifles, LMGs and Under-slung grenade launchers the Armory holds 3 light AT weapons and are normally not distributed, and enough SMGs and combat shotguns to equip one to each fireteam.
Mechanical Mule
Nicknamed 'Wingnut' by the troops, the mechanical mule provides additional combat resupply, offers a small degree of portable cover and can be used to steady the aim of machine gunners. (Follows the team it is attached to, carries 10 points of resupply, can be used either as cover for 1 unit of the team it is with, or allows an MG to fire as if it hadn't moved that turn.)
Campaign Notes
I start at a Popular Opinion of 4, which is brought down to 3 by my inclusion of a medic for the platoon. One of the cheapest improvements and possibly the best bang for your buck. Keeping your men in the fight, especially as casualties mount is going to be important. The Vega platoon organization is built around the 4 man fireteam, with the general triangular idea that ideally any leader should only have 3 direct subordinates to keep track of at a time. The Vega military isn't that of a first rate power, more of the equivalent of a regional power in the modern world.
I've also used the excellent free nation generator by Nordic Weasel Games with a few slight adaptations to add a little background to the conflict.
Planetary Intelligence Report
Lenkova IV
Large Colony: 12 Million
Class M Planet
Limited Heavy Industry
Overwhelmingly Urban
Overwhelmingly Urban
Single Large continent dominated by a large mountain range. Most of the population lives on the coast in one of the spaceport cities or in the foothills where farming and mining are predominant pastimes.
Former colony of the Russian led 'Red Star' Alliance, it has a relatively homogenous cultural makeup, however is a melting pot of political ideals as it was used as political dissidents were often shipped off to serve out their time there. Lenkova IV declared its independence during the Sanur War under President Anton Kirov. Early on Kirov was seen as the popular choice, however massive purges quickly followed and he declared himself as Czar for Life. Widespread corruption and graft from organized crime quickly followed, and as a second wave of immigration arrived from in the form of refugees from the Sanur war, stories filtered out of extensive human rights abuses.
As the Libra-Vega trade route rose to prominence, the lack of security at the Lenkova stop forced the major powers to action. The Red Star Alliance had lost heavily in the war, required extensive logistical assistance, the price however was that once freed, the colony would be administered by an interim coalition government with coalition members providing security for a handover to a democratically elected leadership.
Coalition troops, many of them veterans of the Sanur War, swiftly deposed Czar Kirov and his army of Internal Security forces. The majority were recalled within three months of operations leaving a much reduced Peacekeeping force augmented by Private Contractors working to train a new Lenkova police force.
It quickly became apparent that significant segments of the old Internal Security forces and organized criminal elements had escaped the initial sweep and began a guerrilla campaign to influence the coming the elections and resume business as usual. Multiple warlords and cartels have entered into conflict with the Peacekeeping forces. Although they only had access to weapons and equipment about a decade behind the times, they made significant gains, including the assassination of the Interim Minister of the Interior and destruction of the capital city's main courthouse.
The Terran Treaty Organization authorized additional peacekeeping troops in response and one of the first units to arrive, 3rd Platoon, Alpha Company of the 1st Vega Light Infantry has just arrived on planet. General Kassel in command of the Peacekeeping force has planned a series of attacks aimed at destroying the rebel's safe havens. Operation Greyhound is about to begin.
3rd Platoon, 'Tramplers' - Lt. Valle commanding, Sgt. Sanchez 2ic
Organized into 3 squads of 12 men in 3 fireteams each, along with an HQ element which includes the LT. the Platoon Sgt, and a Mechanical Mule. In addition, a medic has been attached directly to the platoon(bought with asset points) for the duration of their rotation on Lenkova.
Platoon Armory
In addition to the standard assault rifles, LMGs and Under-slung grenade launchers the Armory holds 3 light AT weapons and are normally not distributed, and enough SMGs and combat shotguns to equip one to each fireteam.
Mechanical Mule
Nicknamed 'Wingnut' by the troops, the mechanical mule provides additional combat resupply, offers a small degree of portable cover and can be used to steady the aim of machine gunners. (Follows the team it is attached to, carries 10 points of resupply, can be used either as cover for 1 unit of the team it is with, or allows an MG to fire as if it hadn't moved that turn.)
Campaign Notes
I start at a Popular Opinion of 4, which is brought down to 3 by my inclusion of a medic for the platoon. One of the cheapest improvements and possibly the best bang for your buck. Keeping your men in the fight, especially as casualties mount is going to be important. The Vega platoon organization is built around the 4 man fireteam, with the general triangular idea that ideally any leader should only have 3 direct subordinates to keep track of at a time. The Vega military isn't that of a first rate power, more of the equivalent of a regional power in the modern world.
Sunday, September 16, 2012
Faster Than Light and Let's Play
You are the Captain, your ship has been recalled from mothballs; underpowered, undergunned, and with limited supplies you are on the run from an ever encroaching armada with information vital to the war. And yet you and the few officers you could scrape up into your crew are all that stands between victory and defeat. This is Faster Than Light.
If you want to watch my continuing adventures as Captain, I've included a Let's Play video to go along with this review. This is the first in the series so check out the channel as I upload the rest of the playthrough.
Faster Than Light or FTL is a space simulation by Subset Games, and the closest I think anyone has come to giving you the feel of actually commanding a starship in battle. Now it is definitely an indie game, funded by kickstarter in fact, and is defined by this fact. The graphics are pretty, but there's no 3D or photorealism, FTL is more reminiscent of X-Com than a modern space game(e.g. Star Trek Online or even Descent: Freespace). One of the great joys of these types of games is in customizing your ship, replacing weapons and upgrading systems, and FTL has a very clean and very intuitive method for that. But really, the core of being a Captain in the vein of Star Trek is being able to yell "More power to shields!" or "Divert power from Life Support to the Engines!" This is the game that lets you do that, without the dogfighting that is rather inherent in many of the other games of the genre. The music is again, reminiscent of games of yesteryear, but surprisingly well done.
The various weapon systems all have a unique feel, and there are vastly different strategies one can take, for instance focusing on missiles, or drones, or ion cannons, or even starting boarding actions, but all these must be weighed against their costs and weaknesses. You'll often find yourself weighing the options of upgrading various subsystems versus the possibility of needing the scrap for repairs or fuel down the line. And there's nothing more heartbreaking than having to make the decision on who to send to try and repair your life support systems while there's a hull breach. To lock them in to almost surely suffocate, or risk the whole crew by opening the airlocks and hoping they repair it before everyone dies.
Highlights
-Intuitive Energy control and weapon system
-Really captures the feel of being the Captain of a Starship
-Lots of tactical options for how you want to play your ship
-You will become attached to your crew...and their inevitable heroic sacrifices
-Randomly generated universe means a different experience every time
Weaknesses
-Not all of the tactical options are viable
-You probably won't live long enough to see all of them
-Crew positions are limited(if you have more than 4 crew, the rest are simply relegated to damage control/security)
-Limited events
-Randomly generated universe can screw you over
All in all it's an excellent game for the price, as long as one manages their expectations. The game is a roguelike, and one should expect to die, a lot. Do not expect it to be easy, death is death, and you'll be right back at the start if you encounter it. It was an indie game and they accomplished what they set out to do, making for a very enjoyable product. But it feels like it could have been so much more, I couldn't help but think that with a basic trading module this could have become a wonderful sandbox game as well akin to Freelancer, or implemented more uses for large crews. And after a few playthroughs one gets used to the same sets of events to know what to avoid.
Friday, August 12, 2011
Savage Worlds AAR
Just finished running a quick and dirty Savage Worlds game.
The Backstory
A lone patrol through the jungle wanders its way back to base. Two orc grunts and their Sergeant, accompanied by an Elven Ranger and human medic. The grunts are very low on ammo and the Wild Cards are down to around twenty rounds each for their respective weapons. The orc Sergeant carries a single grenade.
The opposition
Ten Lizardfolk militia members have moved into a blocking position on the ford, using the river to penetrate deep into the supposed safe zone. Nine tribesmen armed with bows and axes led by their chieftain look to take revenge on the foreign invaders of the great swamp.
[Out of character rules explanations and game developments out of character will be in brackets]
After Action Report, Elsinore Skyhawk reporting:
I was on loan from the Rangers in order to accompany a patrol on deep patrol into the Red Zone north of the great swamps. Seven days in the jungle skirmishing with irregulars, but with real engagements to speak of. The village we had been sent to clear was a dud, no such settlement on the map coordinates. Anyways, we made contact with an enemy force around 1400 hours, about a mile out from the Extraction Zone. I was on point and the rest of the squad was in wedge formation behind me. I think they were as surprised as we were because about seven of them were in the water, trying to cross. Three were stationed on the opposite bank behind a pair of fallen trees. The range was between one and two hundred feet, but closed quickly in the beginning moments. [The group of three began in the third range bracket, but was in the second range bracket for the M1's carried by the squad within the first turn. The Lizardmen on the opposite bank had less range for their bows, and would need to use every other turn to aim in order to get a -4 to their attacks)
Our medic, Corpsman Copeland was the only one close enough to immediately get to cover, the rest of us attempted to move towards a rocky area. Fortunately their arrow fire was ineffective, as only three of them were able to fire, the rest struggled to get on land. The group of four to the west was the closest, and Sergeant Barnak sprang up and raced towards them, tossing a grenade. Two of the lizardmen were killed immediately in the blast, but the others made it to shore and began returning fire with their bows. I engaged the second group of three to the east. They had made it to cover, but I managed to feather one. Privates Grumnash and Krugnar moved up to support the Sarge along the west side, as well as providing covering fire for Copeland to dart forward.
In a display of battlelust, and despite the arrows falling about them, Barnak and Grumnash moved to engage one lizardman near the center of the skirmish in hand to hand combat, they succeeded in taking it down. Krugnar was less successful, and they engaged in axe work while I attempted to keep the other group of archers that had made land at bay.
[At this point the lizardmen were dealt a Joker, giving them a bonus to their trait and damage rolls]
The lizardman in combat with Krugnar was able to slip beneath the private's attack and plunge its axe into his stomach before moving back into the water. Barnak and Pvt Grumnash elected to retrieve their rifles in favor of going in after the lizardmen. Now three were in the water, with the three on the far bank continuing to pepper us with arrows, to little effect. Copeland moved towards the fallen Private, but it was obvious he would not get there in time.[Medic edge allows him a chance to revive an extra, but only if he gets there in the same turn]
I moved forward and managed to injure one of those in the water, the rushing river carried it off, and I can only assume it dies of its injuries. Two of them made it to the opposite bank, and those on the opposite bank got their first solid hit on us. Pvt. Grumnash fell to an arrow, I laid down covering fire, and gave a glancing hit to one of the Lizardmen[Shaken, but still up]. Corpsman Copeland, displaying great bravery, ran to where the Private was sitting wounded and immediately began administering first aid[He succeeds in his healing roll, and instead of wounded Grumnash is merely shaken].
Ineffectual fire from myself and the Sergeant is met by a return volley, just as the Private looked to be getting up, an arrow pierced his eye, there was obviously no return from that.
[Lizardmen again get a joker] Copeland bravely tried again to save the Private's life but as soon as he knelt down to work, he was hit by an arrow. [A very lucky arrow, in fact causes two wounds, and he fails his soak roll] Our return fire tags one of the Lizardmen on the opposite bank, it seems our greater range has been telling.
At that point the Lizardmen fall back, fading into the swamps, while we do our best for our medic. A short run back to base brought reinforcements, although last I heard Corpsman Copeland remained in serious condition. With two of ours killed and one grievously wounded, I do not know if we can call our engagement a victory, despite having accounted for Seven of them.
All in all I move that Corpsman Copeland be given the Silverleaf Medal of Valor with Holly Clusters, in addition to any awards his own service grants, and that Sergeant Barnak be given the Oaken Star.
Post Mortem:
Little modifiers from cover and range can add up quite quickly when one only has a D6 in shooting. Only the Ranger(D10) had a better shooting die, and accounted for most of the kills. In addition the Lizardmen suffered worse from both range penalties and damage rolls as a result of having bows to combat rifles. Next time I may have them using captured rifles instead, as they were seriously outgunned. They did have some good turns of luck, with two joker draws.
The big break for the heroes was probably that early grenade, there would have been more close combat otherwise that would have helped to negate their range advantage. Also, I should have played the Chieftain closer in, as it was he was lobbing arrows from the back and not really contributing any more than the extras. Either that or changed him up for a Shaman with a power or two in order to spice things up.
All in all I think the engagement took about an hour including looking up rules we had become rusty on. A quite satisfactory little Vietnam/Fantasy mashup that took little time to set up and little time to play. We used primarily the Explorer's Edition and Tour of Darkness to set it up, with a little help from the Fantasy Companion just to add in the elf, orc, and lizardmen races.
The Backstory
A lone patrol through the jungle wanders its way back to base. Two orc grunts and their Sergeant, accompanied by an Elven Ranger and human medic. The grunts are very low on ammo and the Wild Cards are down to around twenty rounds each for their respective weapons. The orc Sergeant carries a single grenade.
The opposition
Ten Lizardfolk militia members have moved into a blocking position on the ford, using the river to penetrate deep into the supposed safe zone. Nine tribesmen armed with bows and axes led by their chieftain look to take revenge on the foreign invaders of the great swamp.
[Out of character rules explanations and game developments out of character will be in brackets]
After Action Report, Elsinore Skyhawk reporting:
I was on loan from the Rangers in order to accompany a patrol on deep patrol into the Red Zone north of the great swamps. Seven days in the jungle skirmishing with irregulars, but with real engagements to speak of. The village we had been sent to clear was a dud, no such settlement on the map coordinates. Anyways, we made contact with an enemy force around 1400 hours, about a mile out from the Extraction Zone. I was on point and the rest of the squad was in wedge formation behind me. I think they were as surprised as we were because about seven of them were in the water, trying to cross. Three were stationed on the opposite bank behind a pair of fallen trees. The range was between one and two hundred feet, but closed quickly in the beginning moments. [The group of three began in the third range bracket, but was in the second range bracket for the M1's carried by the squad within the first turn. The Lizardmen on the opposite bank had less range for their bows, and would need to use every other turn to aim in order to get a -4 to their attacks)
Our medic, Corpsman Copeland was the only one close enough to immediately get to cover, the rest of us attempted to move towards a rocky area. Fortunately their arrow fire was ineffective, as only three of them were able to fire, the rest struggled to get on land. The group of four to the west was the closest, and Sergeant Barnak sprang up and raced towards them, tossing a grenade. Two of the lizardmen were killed immediately in the blast, but the others made it to shore and began returning fire with their bows. I engaged the second group of three to the east. They had made it to cover, but I managed to feather one. Privates Grumnash and Krugnar moved up to support the Sarge along the west side, as well as providing covering fire for Copeland to dart forward.
In a display of battlelust, and despite the arrows falling about them, Barnak and Grumnash moved to engage one lizardman near the center of the skirmish in hand to hand combat, they succeeded in taking it down. Krugnar was less successful, and they engaged in axe work while I attempted to keep the other group of archers that had made land at bay.
[At this point the lizardmen were dealt a Joker, giving them a bonus to their trait and damage rolls]
The lizardman in combat with Krugnar was able to slip beneath the private's attack and plunge its axe into his stomach before moving back into the water. Barnak and Pvt Grumnash elected to retrieve their rifles in favor of going in after the lizardmen. Now three were in the water, with the three on the far bank continuing to pepper us with arrows, to little effect. Copeland moved towards the fallen Private, but it was obvious he would not get there in time.[Medic edge allows him a chance to revive an extra, but only if he gets there in the same turn]
I moved forward and managed to injure one of those in the water, the rushing river carried it off, and I can only assume it dies of its injuries. Two of them made it to the opposite bank, and those on the opposite bank got their first solid hit on us. Pvt. Grumnash fell to an arrow, I laid down covering fire, and gave a glancing hit to one of the Lizardmen[Shaken, but still up]. Corpsman Copeland, displaying great bravery, ran to where the Private was sitting wounded and immediately began administering first aid[He succeeds in his healing roll, and instead of wounded Grumnash is merely shaken].
Ineffectual fire from myself and the Sergeant is met by a return volley, just as the Private looked to be getting up, an arrow pierced his eye, there was obviously no return from that.
[Lizardmen again get a joker] Copeland bravely tried again to save the Private's life but as soon as he knelt down to work, he was hit by an arrow. [A very lucky arrow, in fact causes two wounds, and he fails his soak roll] Our return fire tags one of the Lizardmen on the opposite bank, it seems our greater range has been telling.
At that point the Lizardmen fall back, fading into the swamps, while we do our best for our medic. A short run back to base brought reinforcements, although last I heard Corpsman Copeland remained in serious condition. With two of ours killed and one grievously wounded, I do not know if we can call our engagement a victory, despite having accounted for Seven of them.
All in all I move that Corpsman Copeland be given the Silverleaf Medal of Valor with Holly Clusters, in addition to any awards his own service grants, and that Sergeant Barnak be given the Oaken Star.
Post Mortem:
Little modifiers from cover and range can add up quite quickly when one only has a D6 in shooting. Only the Ranger(D10) had a better shooting die, and accounted for most of the kills. In addition the Lizardmen suffered worse from both range penalties and damage rolls as a result of having bows to combat rifles. Next time I may have them using captured rifles instead, as they were seriously outgunned. They did have some good turns of luck, with two joker draws.
The big break for the heroes was probably that early grenade, there would have been more close combat otherwise that would have helped to negate their range advantage. Also, I should have played the Chieftain closer in, as it was he was lobbing arrows from the back and not really contributing any more than the extras. Either that or changed him up for a Shaman with a power or two in order to spice things up.
All in all I think the engagement took about an hour including looking up rules we had become rusty on. A quite satisfactory little Vietnam/Fantasy mashup that took little time to set up and little time to play. We used primarily the Explorer's Edition and Tour of Darkness to set it up, with a little help from the Fantasy Companion just to add in the elf, orc, and lizardmen races.
Monday, January 3, 2011
Colonial Battlefleet Review and AAR
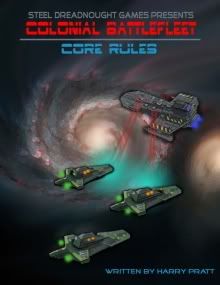
Over the holiday I got a chance to try out the Colonial Battlefleet game from Steel Dreadnought Games. Below is the After Action Report and a quick review.
Meeting at Procyon
The tensions between the Empire of D and the T Hegemony have erupted into full scale war. The trade lanes outside of Procyon would prove a dangerous meeting ground, as Hegemony taskgroup Dreadnought and the Imperial squadron led by the battleship Wisdom would fire the first shots of the war.
This was a 1200 point game, with default tech levels, the only agreement being that fighters and boarders would be avoided since this would be our first game. Oh, and we would be going into this blind as to the other's fleet composition or ship loadouts, once on the battlemap we told each other which ships were larger than the others, but that was it. I was quite pleased with how we managed to set up and play, even being so unfamiliar with the rules. We took 3 hours total, from opening up the spreadsheet to build some ships to rolling the last die and calling it quits.
Order of Battle
T Hegemony
BBD Dreadnought – 640 tons, with turreted banks of heavy phazers, mag cannons, and anti-neutron torps
BCF Archer – 410 tons. Phazers forward, and the rest taken up with two 3 launcher mounts for its 24 ASGMs
CLR Cheetah – 144 tons. Its sole armament were 3 forward anti-proton torpedo bays spread in 2 hardpoints
Empire of D
BBD Wisdom – 640 tons. A forward firing rail gun, along with turreted banks of phazers and disruptors, and a single ASGM launcher for 8 missiles
BCB Courage – 560 tons, sporting turreted batteries of turbo heavy lasers and heavy disruptors, with a forward bank of anti-neutron torpedos.
Debriefing, Commodore Nomis of the HNS Archer
With our superior command and control we would set the tone of the battle. However it became evident that they would dictate its terms. The Imperial ships started in close formation, we closed in a slightly more open one, with the Dreadnought leading the way, the Archer and Cheetah sheltering along its flank at about three combat sectors distance. The first turn is at extreme range, and we choose a tactical option, and wait for them to close. It turns out that we are in fact, within their range. A stunned shock runs through the crews as they not only fire, but hit with enough force to heavily damage the shields on the Dreadnought, the Imperial ships are running with FC4. Our reply is minimal, as we fire at the larger ship to no effect, its shields are too heavy at this range...there is only one thing to do, close the distance to bring our shorter ranged and hopefully more potent weapons into play.
We choose the tactical option again, the two Imperial ships close to adjacent combat sectors and look to be ready to cross each other next turn. The second turn sees our small flotilla accelerating, we had a delta advantage over them already, running at 5 to their 3, all of our ships increased speed to delta 6. The Imperial ships fire, a deadly volley, that smashes through the shields of the Dreadnought, damaging the heavy phazers right as they line up on the smaller enemy ship, as well as launching an ASGM. Still, the Mag cannons do a number on the enemy shields, allowing torpedoes to get through, although there is no penetration. The Archer launches a full salvo of ASGMs, while the Cheetah continues to hide behind its larger cohorts.
The phazors were quickly repaired, but the ships are crossing at speed, and although the Dreadnought penetrates the larger Imperial ship Wisdom's shields, the combined power of the two capital ships cuts through her shields, an engine room hit seals her fate. Archer fires another salvo of ASGMs, now in sprint mode, there is little that can stop them from hitting on the next turn sequence. Cheetah darts in and fires her torps, but they do little damage against the heavily shielded Courage.
The ASGM's finally come into play, damaging the bridge of Courage, and a disruptor bay on the Wisdom. But it is not enough, the Dreadnought has drifted past the battle, and both enemy ships are lined up for a strike upon her aft shields. Her heavy armor is not enough to save her from destruction. The Archer fires another salvo of ASGM's, and the Cheetah makes use of her superior speed to place herself in the aft arc of the Courage, hammering through her shields with torps. The Wisdom however, in chasing the Dreadnought, is finding it hard to close the distance and support her sister ship. It can still however, punish the Archer with its heavy armament, cutting through the lighter ships shields with ease and damaging one of the ASGM batteries. The Courage as well is able to bring its port facing turrets to bear, the Archer is now down two shield facings, and its F/P shields will be damaged for the rest of the engagement.
Our two ships continue to rake the Courage's aft shields, but a final combined salvo destroys the Courage, it is then that taking stock of the ASGM reserves on the Archer that I decide to retreat, we will use our delta advantage to escape and fight another day. I send our final ASGM stocks in their direction, if only to discourage pursuit. It does not work very well, they burn delta to increase velocity and chase, and once again that heavy long range armament aided by superior fire control comes our way. 12 hull, 10....5.... The girders creak and grown, bridge consoles show red hull breaches across the board, and it all comes down to their final shot with the single heavy rail gun. It misses, and we breathe a sigh of relief. We will live to fight another day.
Results:
Hegemony lost 640 tons
Empire lost 563 tons
Evaluation:
Next time, I won't skimp on fire control. Two of my 3 ships had FC 2 and short ranged weapons, D had a definite range advantage that showed at both the beginning and end of the battle. I overbought on PD given that he had a total of one launcher in his fleet, and he under bought. Even with 3 and 4 PD die my missiles consistently got through, taking his defender down to half health despite my inability to pierce its shields. And having a 3 Delta ship allowed me to plant myself firmly in his rear shields at the end. I closed too fast and didn't start my turn early enough with Dreadnought, thus its early demise, taking out about two thirds of my potential firepower.
The ASGM's were surprisingly effective on my part, partly due I'm sure to the fact that his defender had 50 points of shield in its forward arcs, something that I was hard pressed to cut through, even with my Battleship. In fact, only two flights of 3 were unable to turn and reengage effectively, and even those two were able to herd his ships, if not directly attack them. It helped that they were in effect more maneuverable than his ships. And AV8 ships are very, very hard to crit against, even with 1D10+1 weapons, although I have to say that even my AV6 ship shrugged off his weapons pretty well, suffering only three criticals as it was whittled down to 5 hull, two hardpoints(one empty) and a shield. Which was quite fortunate, since I was hard pressed to repair them.
His evaluation of the battle consisted muttering about not skimping on firing arcs, as after the first two turns, none of his forward firing weapons actually had any impact on the battle. And for him, the ASGM was nothing more than wasted space, especially since he ended the battle with 5 left in the magazine, although the last few turns I think he gave up on them, as a single ASGM against 4PD is pretty useless. He also expressed disappointment on how the battleline ship performed, he may have been able to repair those critical hits easier, but I wasn't making many to begin with. I'm pretty sure he wished it was another defender or a flagship instead, because I won every single initiative roll.
Either way, I think we both agreed that the game was quite enjoyable, and one of the easiest to be able to set up and play on short notice. Being able to work with the spreadsheet and then print out the SSDs was a definite plus. Although I knew that I wouldn't snatch victory out of it once my Battleship went down, I was definitely on the edge of my seat as my fleet tried to pull out a draw, and escape. 5 hull out of my 64 hull BC before I was able to get out of range, now that's a nail biter!
Now some general notes on the rules system. Personally, at about $15 dollars, it's a bargain. There are about 60 pages of play rules, options, and an explanation of equipment, and the remaining 60 pages are split about equally between scenarios, warship construction rules and premade faction ship lists, with a few pages of counters that one can print out. The last two sections can easily be skipped however as it also comes with an excel spreadsheet that makes creating your own ships quick and easy. Illustrations are mostly functional, it's not exactly a pretty product, but they get the job done.
I mentioned before that it only took us about 3 hours to play a game. I would say that about half an hour to an hour of that was setup and creating our fleets. Although there were only a few ships in play, I feel that we could easily expand the fleet and get done in a similar amount of time, due to added familiarity.
As for the rules themselves, the first thing that comes to mind with them is that they are clean. You won't be scratching your head looking for dice, it uses D6s and D10s and that's it. The ship datacards that one can print out hold everything one needs to know about a ship, including the special roles that they can have. Those help define your ship and fleet, whether it's a Battleline ship designed to deal hurt, a light Scout, a maneuverable Rapid Deployment Force ship, etc.
The game may only use two die types, but it uses them well. For example to attack one rolls a die and adds in their fire control, which essentially allows a player to create the best engagement range for their ships. Movement was pretty standard fare, and easy to keep track of with the ship datacards. The fleet construction rules tend to favor a heavier force as opposed to swarms, and it felt a little funny that we both fielded Battleships and Battlecruisers with only my single light cruiser as backup, as opposed to a more balanced force, although this is indirectly modified in some of the scenarios. Perhaps if a campaign supplement came out then this would be addressed.
For the price, I can't say I have many complaints. Essentially this is an excellent generic ruleset for space combat, I could well see myself playing out Star Trek, B5, and other settings, not to mention the recently released Man vs Machine expansion that covers BSG. Although I'm not sure how such a fighter heavy game would play out given that ships can't be stacked.
What wins me over though, is the ease of play. Compared to say, Starfire, Battlefleet Gothic, or Battlespace for example it felt like a breeze, and there was no need to dig out the trusty ruler as long as you have a hex grid. And thus Colonial Battlefleet is liable to become my starship combat game of choice in the foreseeable future.
Tuesday, September 29, 2009
A Year Under Ground
I accepted the assignment from the Low King with a heavy beard and heavier heart. However, the destiny of the mountains calls to me, and there is only one answer when the mountain calls. Well, two actually, but being squashed was not very attractive. So we set out into the wilds, my mission, to establish a viable outpost for the dwarven empire of Lor Tangath in preparation for the arrival of settlers the following year.
Our disreputable party numbered seven, with the unspoken rule that no dwarf talk of his or her past. Whether they were criminals, colonists, or adventurers, everyone was to be expected to pull their weigh. Two miners, two farmers, a woodcutter, a mason, and one who seemed to have no applicable skills whatsoever. I would however, learn soon the necessities of survival. In addition, we were given breeding pairs of dogs, and cats, one of which soon adopted me as a sucker during mealtimes, a horse, and a camel. From what musty stockpile in the mountainhome came the camel I do not know, perhaps it was all a cruel joke.
Fortunately I was given free access to the kingdom's maprooms, and was able to carefully select an appropriate site. A calm temperate area which recommended itself by the presence of a river valley, allowing easy access to fresh water. As well as the ores promised to be plentiful within the nearby mountains. Something all dwarvenkind could appreciate.
We decided to name our new outpost Taranathel, in honor of our home kingdom. The rainy season was just beginning as we started, and as such my first priority was to get the alcohol and foodstuffs under cover before they went rancid. Hot dwarven ale is no friend of ours, any brewer could tell you that it's best kept in a dark cave, preferably served fresh from a cooling mountain spring. I order mining excavations to begin.
Progress has exceeded expectations! We now have storage areas for our booze. A wood workshop and a stone workshop both followed quickly, as I hoped to put together beds and tables, for a sleep deprived and hungry dwarf is not something any of us wish to encounter.
Excavations continue quickly. At this rate, we could have the entire mountain hollowed out by the time our first settlers arrive. And perhaps a posting back to civilization would be in order. As the refuse began to pile up inside, I quickly ordered a large field cleared outside. The sun and rain will do its work on any garbage we accumulate. A large farming area was set up along the main tunnel, I feel it should suffice even when our outpost grows to accommodate hundreds, much less our seven. We did have a setback along the north tunnel, in an effort to decrease our need to get water from outside I directed our tunnelers to excavate what I thought to be an underground pool...which unfortunately flooded the entire corridor. Fortunately no lives were lost. I am puzzled however as to why we have not discovered any ore, semi-precious stones yes, but as of yet no ore of any kind.
I have just been informed that the reason we have not yet found ore is that we did not dig into the side of a mountain as I had thought. Instead we are well ensconced within a dirt hill, thus the reason that excavations proceeded so quickly. This may be a slight setback. Nevertheless, I order our miners to continue excavating exploratory tunnels, down into the depths of the earth itself. Worries that we are running low on foodstuffs prompts the creation of a butcher...I wonder how camel tastes.
I am surrounded by nincompoops! Apparently I must tell each one what jobs they are allowed to do. The camel however, tasted delicious, as did the horse. And after sending a few dwarves to hunt, there is a near collapse of the groundhog population as dwarves, elated to be hitting things, wrestle them to the ground and rip off their furry little heads. Piles of tiny skulls litter the refuse heap. At times I fear for my sanity. I have ordered separate bedrooms for everyone.
Seven levels down and still no ore?!? Failure after failure. Not only is there no ore, but the trading caravan cannot find its way here, why I do not really know, for their messenger arrived easily. Even so, I constructed a trade depot just in case they found a native guide, as well as began construction of workshops to produce trade goods. None of my current dwarves have the skills to operate many of these workshops, but perhaps the migrants will be able to use them. Expansion of the storage rooms has been completed, and my cat had kittens...which promptly adopted me as well. Unfortunately, they don't seem to realize that the rats are all in the storeroom, not in the dining area. Speaking of dining, I wonder why our farm is not producing anything.
Ahhh, of course. The farmer had readied everything, but was waiting for me to tell him what to plant...the only thing we have seeds for dullard! Mushrooms, mushrooms, and more mushrooms! One of our dwarves has taken ill, felled by a particularly vicious groundhog. The others are requesting a bucket to take water to her. It seems our carpentry division has been slacking off(oops!). Also I have heard word that Kobold and monkey thieves have absconded with some of our trade goods. Given that I don't believe monkeys to be native to this ecology, I can only surmise that they've been trained and set upon us by the Kobolds. Security measures are taken...I install a door.
Huzzah! The migrants have arrived, farmers, peasants, woodworkers, and masons. Our population explodes to 15. As well as a wondering mage that offers to take a magical portrait of the main level of our outpost. But, they also bring news that I have been recalled. While I am hopeful it is for a parade and honorable pension, unfortunately it seems more likely that my many mishaps have caused them to lose faith in me somehow. Was it building into a hill instead of a mountain? Or flooding our tunnels with my search for fresh water? The shoddy showing in the groundhog war that left one of our own on death's door? The mishaps in planting that have led to a severe food shortage over the winter months? Only time will tell.
I leave you with a picture of Taranathel as I left it. Empty workshops and empty throne rooms. Although the pub, as always shows signs of life, as do the vermin infested larders. Perhaps another ruler could bring life to this grand experiment.

Note: While I had played Dwarf Fortress before, this is the first time I'd played since the update which made the game play in 3 axis. I stumbled across the story of Boatmurdered and couldn't help but dive back in. Quite a bit has changed since I first played, as is evident, it used to be that you just burrowed into a cliff face and encountered ores the further in you went, eventually reaching an underground river which...well, not that this excuses my failures. Anyways, check out Boatmurdered for an altogether more hilarious example of what could happen.
Also, I used the Mike Mayday Graphics Edition if anyone was wondering.
Our disreputable party numbered seven, with the unspoken rule that no dwarf talk of his or her past. Whether they were criminals, colonists, or adventurers, everyone was to be expected to pull their weigh. Two miners, two farmers, a woodcutter, a mason, and one who seemed to have no applicable skills whatsoever. I would however, learn soon the necessities of survival. In addition, we were given breeding pairs of dogs, and cats, one of which soon adopted me as a sucker during mealtimes, a horse, and a camel. From what musty stockpile in the mountainhome came the camel I do not know, perhaps it was all a cruel joke.
Fortunately I was given free access to the kingdom's maprooms, and was able to carefully select an appropriate site. A calm temperate area which recommended itself by the presence of a river valley, allowing easy access to fresh water. As well as the ores promised to be plentiful within the nearby mountains. Something all dwarvenkind could appreciate.
We decided to name our new outpost Taranathel, in honor of our home kingdom. The rainy season was just beginning as we started, and as such my first priority was to get the alcohol and foodstuffs under cover before they went rancid. Hot dwarven ale is no friend of ours, any brewer could tell you that it's best kept in a dark cave, preferably served fresh from a cooling mountain spring. I order mining excavations to begin.
Progress has exceeded expectations! We now have storage areas for our booze. A wood workshop and a stone workshop both followed quickly, as I hoped to put together beds and tables, for a sleep deprived and hungry dwarf is not something any of us wish to encounter.
Excavations continue quickly. At this rate, we could have the entire mountain hollowed out by the time our first settlers arrive. And perhaps a posting back to civilization would be in order. As the refuse began to pile up inside, I quickly ordered a large field cleared outside. The sun and rain will do its work on any garbage we accumulate. A large farming area was set up along the main tunnel, I feel it should suffice even when our outpost grows to accommodate hundreds, much less our seven. We did have a setback along the north tunnel, in an effort to decrease our need to get water from outside I directed our tunnelers to excavate what I thought to be an underground pool...which unfortunately flooded the entire corridor. Fortunately no lives were lost. I am puzzled however as to why we have not discovered any ore, semi-precious stones yes, but as of yet no ore of any kind.
I have just been informed that the reason we have not yet found ore is that we did not dig into the side of a mountain as I had thought. Instead we are well ensconced within a dirt hill, thus the reason that excavations proceeded so quickly. This may be a slight setback. Nevertheless, I order our miners to continue excavating exploratory tunnels, down into the depths of the earth itself. Worries that we are running low on foodstuffs prompts the creation of a butcher...I wonder how camel tastes.
I am surrounded by nincompoops! Apparently I must tell each one what jobs they are allowed to do. The camel however, tasted delicious, as did the horse. And after sending a few dwarves to hunt, there is a near collapse of the groundhog population as dwarves, elated to be hitting things, wrestle them to the ground and rip off their furry little heads. Piles of tiny skulls litter the refuse heap. At times I fear for my sanity. I have ordered separate bedrooms for everyone.
Seven levels down and still no ore?!? Failure after failure. Not only is there no ore, but the trading caravan cannot find its way here, why I do not really know, for their messenger arrived easily. Even so, I constructed a trade depot just in case they found a native guide, as well as began construction of workshops to produce trade goods. None of my current dwarves have the skills to operate many of these workshops, but perhaps the migrants will be able to use them. Expansion of the storage rooms has been completed, and my cat had kittens...which promptly adopted me as well. Unfortunately, they don't seem to realize that the rats are all in the storeroom, not in the dining area. Speaking of dining, I wonder why our farm is not producing anything.
Ahhh, of course. The farmer had readied everything, but was waiting for me to tell him what to plant...the only thing we have seeds for dullard! Mushrooms, mushrooms, and more mushrooms! One of our dwarves has taken ill, felled by a particularly vicious groundhog. The others are requesting a bucket to take water to her. It seems our carpentry division has been slacking off(oops!). Also I have heard word that Kobold and monkey thieves have absconded with some of our trade goods. Given that I don't believe monkeys to be native to this ecology, I can only surmise that they've been trained and set upon us by the Kobolds. Security measures are taken...I install a door.
Huzzah! The migrants have arrived, farmers, peasants, woodworkers, and masons. Our population explodes to 15. As well as a wondering mage that offers to take a magical portrait of the main level of our outpost. But, they also bring news that I have been recalled. While I am hopeful it is for a parade and honorable pension, unfortunately it seems more likely that my many mishaps have caused them to lose faith in me somehow. Was it building into a hill instead of a mountain? Or flooding our tunnels with my search for fresh water? The shoddy showing in the groundhog war that left one of our own on death's door? The mishaps in planting that have led to a severe food shortage over the winter months? Only time will tell.
I leave you with a picture of Taranathel as I left it. Empty workshops and empty throne rooms. Although the pub, as always shows signs of life, as do the vermin infested larders. Perhaps another ruler could bring life to this grand experiment.
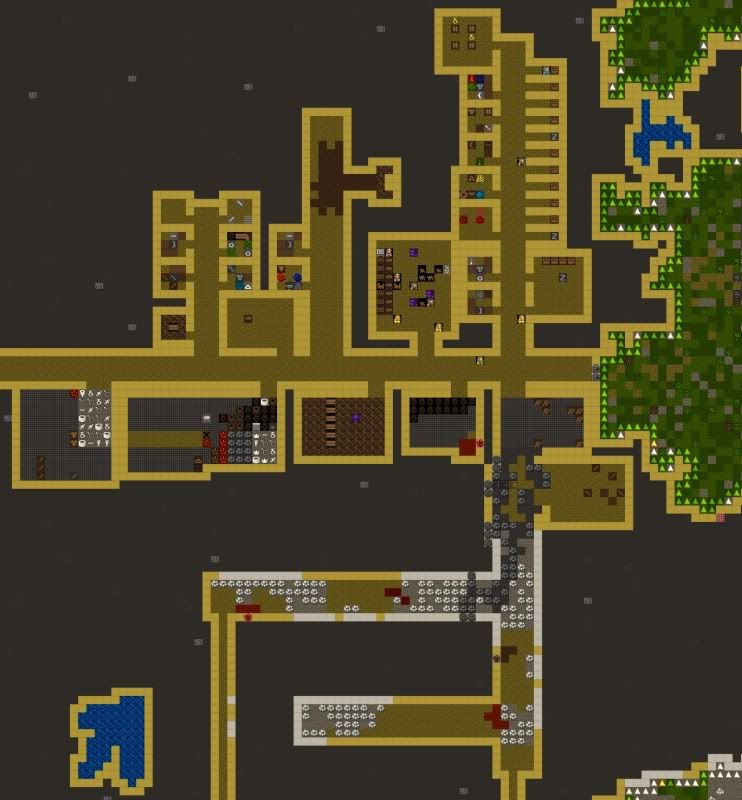
Note: While I had played Dwarf Fortress before, this is the first time I'd played since the update which made the game play in 3 axis. I stumbled across the story of Boatmurdered and couldn't help but dive back in. Quite a bit has changed since I first played, as is evident, it used to be that you just burrowed into a cliff face and encountered ores the further in you went, eventually reaching an underground river which...well, not that this excuses my failures. Anyways, check out Boatmurdered for an altogether more hilarious example of what could happen.
Also, I used the Mike Mayday Graphics Edition if anyone was wondering.
Sunday, May 18, 2008
Moderns Ops Review and AAR
Modern Ops by Pinnacle Entertainment Group is a skirmish level wargame based on the Savage Worlds ruleset. It uses the abbreviated version known as the Showdown rules as well as its own setting rules.
Now for anyone familiar with the Savage World rules, the Showdown set is essentially what happens when you strip off most of the RPG elements and excess fat away to turn it into a lean mean fighting machine. The result is a highly intuitive set of rules that can move fast even if one has little experience with them.
I'm not going to go into the core system, since that's a bit beyond the scope of this post. On the plus side, it lived up to the expectation of Fast, Furious, Fun. Highlights included the unit cards that are available for free, these kept bookkeeping down to a minimum, essentially all we had to recall was how many bennies we had left, and some of the expendable ammo(grenades and RPGs). The pace never bogged down, even though the units might have from enemy fire, and the setting rules made it appropriately deadly for the genre.
On the down side, there were portions of the rules that were either vestigial or lacking. Close Combat rules and mount rules were included, but there was no real follow up on either. There weren't any living mounts statted out, and there was no section for hand to hand weapons in the armory. At best one could look at the batons that the swat teams wielded, but I felt that given how they emphasized how important Ganging Up bonuses were, especially to untrained troops, that they should have at least included a few. Even if they just had the point values for the baton, a bayonet and knife/sword it would have been enough. Also the militia units refer to not being able to use the aim action, but from what I can see, that was one of the actions cut out from the rules. Suppressed weapons were another item that didn't really have an explanation aside from the obvious. Finally, nowhere could I find the point values associated with the various abilities and edges.
I would also have liked some more Savage Tales to have come with this product, but perhaps that's just me being spoiled, as some games only come with a single or no scenarios. But on to the AAR.
We rolled up a meeting engagement, and decided on a 1000 point target, we both ended up relatively close to the number. I took the role of the Taliban commander and my opponent taking over as the German commander. We put together a few ruined city blocks for them to fight over. For this game we played a bit loose on the Loyal rules, as he wasn't happy about having to retrieve corpses, and in turn I was able to play loose with my morale checks, which would occur whenever 25% of a team is lost. Which, in a 4 man team means that I would be checking for every casualty, so I said it would trigger when >25% was lost in a single turn.
German Forces
Panzergrenadiere Gruppe(644 points)
-1 NCO with G36
-5 Riflemen with G36
-2 Soldiers with MG3
Sniper Fireteam(388 points)
-2 Snipers with G3-SD1
-2 Soldiers with MG3
=1032 points
Taliban Forces
Taliban Command Fireteam(353 points)
-1 Taliban Warlord Leader with AK-47(Wild Card)
-1 Soldier with RPG-7
-1 Machinegunner with RPK
-1 Soldier with AK-47
Taliban Fireteam(2x)(253 points each)
-1 Soldier with RPG-7
-3 Soldiers with AK-47
Taliban Sniper (166 points)
-1 Sniper with Dragunov SVD(Wild Card)
=1025 points
I'll be referring to the placement of units by my perspective at the Taliban edge of our 2x6 table. The Command Fireteam set up along the far left, with one fireteam in the middle and one on the right, the sniper set up along the right hand side as well. The German forces mirrored mine, their 8 man team on the left and their sniper team on the right.
The first turns were mostly feeling each other out, but some skilled sniper fire by the Germans pinned down my rightmost fireteam, shaking the RPG man. My own sniper returned fire from the second floor of a building, but had little success. It was not an even matchup. I outranged them, their guns considered my sniper as in medium range, while mine could reach them as close range. However this was evened up by the fact that my sniper only had a D10 in shooting while the German snipers were sitting pretty with D12s. I quickly learned that their body armor(giving them a toughness of 11! Most of my soldiers had a 5 or 6) kept them relatively impervious to small arms fire.
Along the left side of the board both sides inched towards each other. I started things off with a volley of RPG shots, which quickly took out one of the sniper team. After that my opponent kept all his units relatively spread out, which helped reduce casualties, but kept him from a concentrated assault as my command team moved into position.
Midgame was when I learned the importance of not bunching up as well. The German soldiers were keeping their heads down due to my command team, I believe that one rifleman and one machinegunner had been killed by my MG or RPGs, my AK-47 armed soldiers were having trouble hitting or damaging his(although that might have been due to the dice more than the mechanics), again due to the body armor. His snipers had concentrated on my RPG soldiers, taking out the one in my command team and in my right hand side fireteam. My middle fireteam had bunched up, minus the RPGman who had been shaken by sniper fire and had not caught up with the man bunch, but a well placed grenade took out three of them in one hit. What was amazing was that the RPGman was able to make his morale check, acing it and continuing on. Meanwhile, every German soldier that was getting close enough to toss a grenade was being taken out with accurate MG fire.
The endgame was a continued attempt to flush out my command team with grenades, and accurate sniper fire chipping away at the remainder of my forces. By the time we ended due to hunger the tally was pretty close. I had lost 7 of my 13 men, including my leader, while he had lost 7 of his 12. 6 of those were from his Panzergrenadieres, leaving only his leader and a MG man from that squad. The remaining casualty was from his sniper team, which really didn't move all that much throughout the game.
I was actually rather surprised at how well the Taliban forces did given that of my 13 soldiers, 9 of them had weapons that barely scratched the body armor of the German troops. My opponent's major complaint was that the German squads were too big, in order to avoid a grenade or RPG landing in the middle and taking multiple soldiers out, he was forced to essentially move his forces in a chain, which limited firepower at a point. Also he felt that the two MG men with his sniper team would be better served near the front, as opposed to with his sniper on overwatch. Actually that whole team could have moved up and flanked my forces, given that my own sniper was having trouble doing any damage other than perhaps shaking a unit for a turn or two.
My own problems included, of course, the fact that the body armor made most of my shots harmless, it was only due to the luck of my MG(acing damage repeatedly) that I was able to do as much damage as I did. In general I felt that there was a little trouble with interrupting actions, as we had two ties before resolving an interrupt, I think the one on hold should win ties personally, so I might houserule that. My leader's fireteam was waiting for them to move into the open, but lost the interrupt and got a grenade down their throat for their trouble.
All in all, a really fun game that played fast and was suitably deadly. Unlike the Chain Reaction ruleset, this game doesn't almost run itself, but the Modern Ops ruleset is very intuitive, and most likely second nature to anyone who has Savage Worlds. So, aside from the above gripes I'm quite happy with it. It could have been executed better, so it's not perfect, but it gets done what it set out to do.
Sunday, March 30, 2008
Carriers at War
Midway
Or that's how it could have gone.

Carriers at War published by Matrix games, this naval simulation recreates the major naval battles of the Pacific theater of war, with plenty of variants and possibilities, it's enough to keep you well entertained. The above AAR was from a random Midway variant, giving the US a substantially larger carrier force than was historically present. Of course, it didn't do them that much good.
The look is very much old school, but pleasant, I'm reminded of a real time version of PTO, except on a more intimate scale. There's no production here, just your carriers and the enemy, and a whole lot of ships, bombs, and torpedoes with somebody's name on it.
The first principle of carrier warfare, is to get in the first strike, as hard as you can with as much as you can before they strike back. And that's apparent in this game, a lucky search plane can turn the tide of the battle, and don't think that all the battles come out as easy as this particular AAR. I actually played through twice, the first time forgetting to take screenshots(Doh!), the first time came out much closer, with an American carrier strike launched at my main carrier force at about the same time as I launched, leaving me with 4 of my 5 large carriers sunk, and further air operations reliant on my light carriers in the northern force.
This is a game where minutes count, and wisely they have a 5 minute count option, not to mention uninterrupted running for the long nights. So I have to say that the AI is adequate, make a mistake and let your carriers come too close without a CAP and expect to get slaughtered, because even a minor mistake that costs you a carrier can turn the battle. On the other hand, don't expect any dazzling tactics from the AI, it strikes hard, and strikes fast, but has a bit of tunnel vision, going after the enemy it can see instead of the enemy it knows should be out there.
Playability, well it's not a very steep learning curve in my opinion. The controls are very intuitive, left click to select, right to order a move, or else select an option from the dropdown menu. Your options are a bit limited by the scale, and that's good for the most part, since you don't have to worry about the minor details. In fact the best way to learn is to play through a game or two. Set your search rosettes, order about your task forces, and learn the value of cloud cover and a CAP(combat air patrol) the first time an enemy strike blasts your carriers out of the water. Or if you're lucky, you can deliberate over the difficult choice of striking as soon as you spot an enemy force, or waiting to get closer(at extended range your planes will have only a fraction of their maximum payload). To leave your planes below decks until the strike, or to arm them beforehand and leave thousands of tons of live ordnance up on your decks for an enemy strike to ignite. To send your fighters in armed with bombs or to have them fly escort. To take the time that you may not have and send them in as a cohesive strike, or let them fend for themselves, winging their way towards destruction as soon as they clear the decks? Once you send your strike off to that suspected enemy contact all you can do is hope and pray, as your brave little simulated pilots dive towards victory or death. Once there your pilots will select their own targets and report back(which can either be accurate or not depending on your options) on their suspected kills. But be warned, I've lost more than one game to an enemy carrier force that I thought sunk, so it's up to you to try and get your ships back under cover of a squall or storm while your planes rearm.
On the other hand, this abstraction and hands off approach does have a few downsides. Your surface fleet fights in much the same way, you tell your fleet elements to get closer or further away and select a main group of targets for their guns and that's it. You get a few seconds of explosions and that's it. This however, doesn't happen that often to begin with, so it might be forgiven, the only time I actually had a surface engagement was when my ships and the enemy's tried to use the same squall as cover during the night and more or less ran into each other. Other times one side or the other would usually see the odds and be able to retreat.
Also, your taskgroups are relatively fixed, you can dispatch a ship to retreat or scuttle it, but other than that you are unable to split or combine TG's. Something which is especially useful as Japan who tend to have all their carriers in a single large TG, making it very vulnerable, whereas until the late war the US nearly had a TG for every carrier, making it a bit slow to coordinate strikes. Of course, in my opinion this can be forgiven due to the creator's wish to avoid ahistorical hindsight tactics, but it still would have been a nice feature.
In addition, you'll eventually get tired of the same plane attacking random ship/plane shot down by CAP/AA, and ship showing damage(signified by a fire and estimation of its health) animations, and be ready to just see the results. So be warned that this isn't a showy game. Speaking of planes, I would have liked a little more detail on the search plane routes, the rosette is user friendly, but I wouldn't have minded being able to modify the standard search pattern or order additional planes out. And part of the abstraction is the need for your carriers to more or less stay in one place once planes are launched, I seem to recall the Japanese coordinating rendezvous points so that their carriers didn't have to remain stationary(correct me if I'm wrong however, since this is from half remembered history courses taken awhile back). So the ability to estimate and place a landing/retrieval point would have been nice.
Another thing that history doesn't exactly give us, is balance. There are playing one side or another will be decidedly easier depending on the scenario, shifting from Japan to the US respectively. Though the variants do a good job at providing alternate orders of battle(Playing as the US at Midway in the historical scenario for example or as Japan in the Philippine Sea scenarios, you realize how desperate the situation can be, outnumbered, outgunned and outpositioned, but not out of the fight). Fortunately, it ships with a very functional editor, and if you wish you could create scenarios to your heart's content.
The one thing I would have liked, is a way to tie the scenarios together in a campaign. Though I'm sure that'd be difficult given how ahistorical things can get if one side gets in a lucky strike. Imagine the US carriers wiped out at Pearl, the entire war would have changed, not just the order of battle for the next mission. So I can understand why it's presented the way it is, with the main battles(Though conspicuous in it's absence is Leyte Gulf, which is surprising, it would have been interesting to replay the harrowing trial of Taffy 3) and variant scenarios.
Now, the pricetag, at about $50 I found it a bit on the pricey side. For $50 you can get a new cutting edge, graphics out the wazoo, computer game, or an epic, down to the last faulty instrument panel on that plane sort of game, and this isn't an epic, battles usually take between half an hour to an hour if you play like I do, but it does what it needs to. Provide some real good edge of your seat tension, which is all too often missing from a strategic wargame. This feels like a beer and chips game, one that you don't have to devote a whole night playing, and it doesn't require a degree in logistics and a MENSA membership to enjoy the heck out of it.
The question however, is it worth the money when other independent games usually tend to run about twenty bucks less. Well, when I first started playing and realized the limits to my options I was almost ready to say no, but then I kept playing, and kept playing, and kept playing. I was hooked, an hour free here, an hour free there, in fact I was even dreaming about search rosettes and torpedo strikes for a few days! And now after a week or so of buying it, I'm convinced that I got my money's worth, because I know I'm going to keep on playing. I do feel that a more detail oriented grognard may be disappointed, but if you want a fun carrier game that doesn't take forever, then this is a good buy.
Early Morning, June 4th, 1942
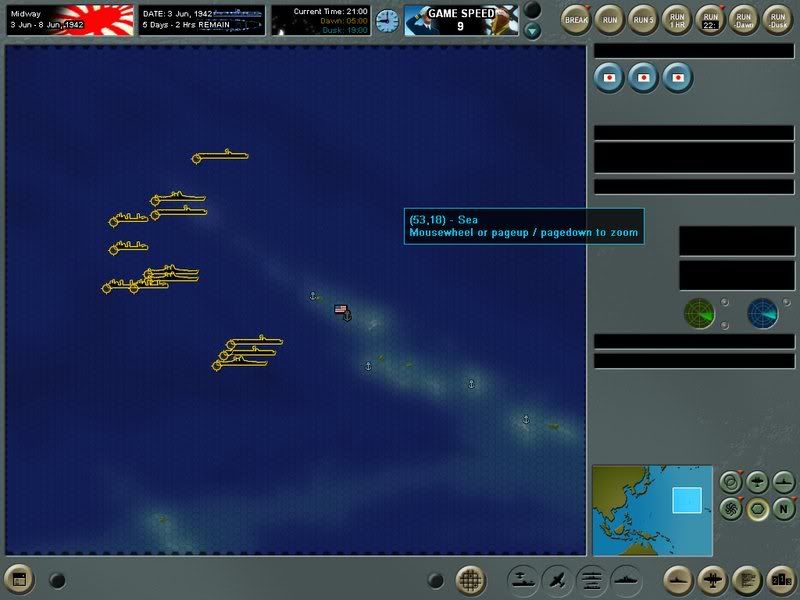
Seaplanes fill the air.
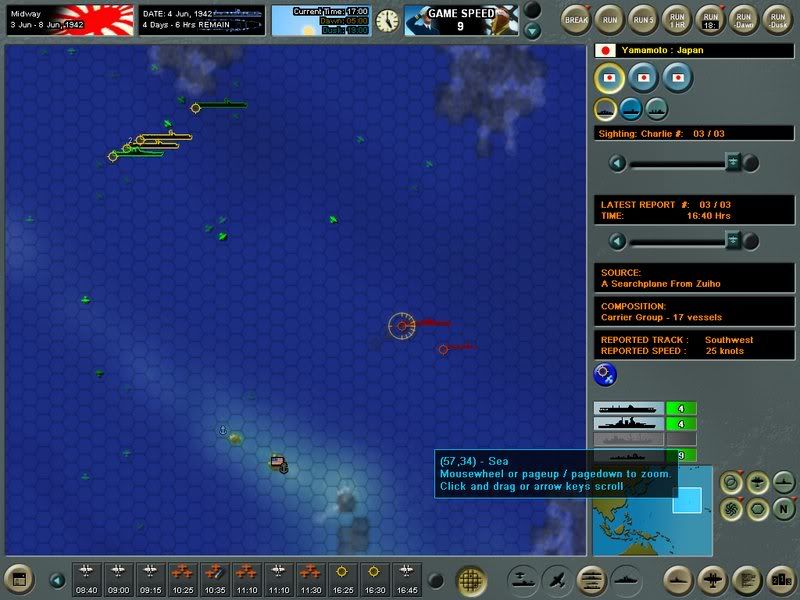
8:40 A seaplane from Midway spots a Japanese carrier group, a heavy and light carrier escorted by an unknown number of cruisers and destroyers, but is this the main group that US codebreakers have been warned about?
12:00
Midway command thinks so, for the next 20 minutes the Japanese TF comes under air attack. Heavy fighter cover and AA claims a heavy toll, the CAP accounts for 14 kills and 7 damaged, the AA damages 4 before the US fighters disengage, without a single successful strike.
16:40
A Search plane from Zuiho has detected a large US carrier force, 4 carriers. A strike is debated, but there is no way that the planes would arrive before sundown, and the smaller northern force cannot risk its air assets in a dusk strike, and even more dangerous, a nighttime landing.
June 5th
6:50
Dawn brings a strike at the Jap seaplane force anchored at Neva shoal....but not before the US carriers are revealed. Nagumo makes a fateful decision, to launch his full strike from the southern carrier force, but at 420nm it would remove 70 dive bombers to wait for his planes to form up, it will not be a cohesive strike.
7:55
Just as planes are leaving the Jap main striking force to the south and east of midway, a searchplane is spotted overhead. But it is too late to recall the fighters for CAP duty, the entire strike has been sent to attack the US Carrier force.
9:35
The Jap bombardment force, has snuck past the patrols, Midway is under fire, and the carriers Saratoga and Wasp are under attack, with planes on deck! Nimitz is obviously preparing to strike Nagumo's main force.
10:00+
Yorktown is also attacked, but its planes are up, taking a toll on the strike. At the worst possible time, Jap planes spot Hornet and Enterprise, bombs away! Wasp and Saratoga soon fall victim as well.
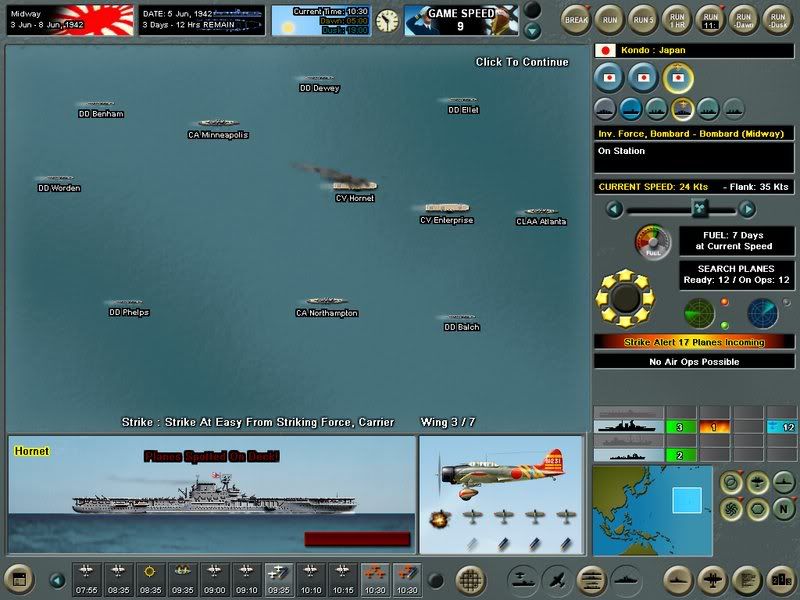
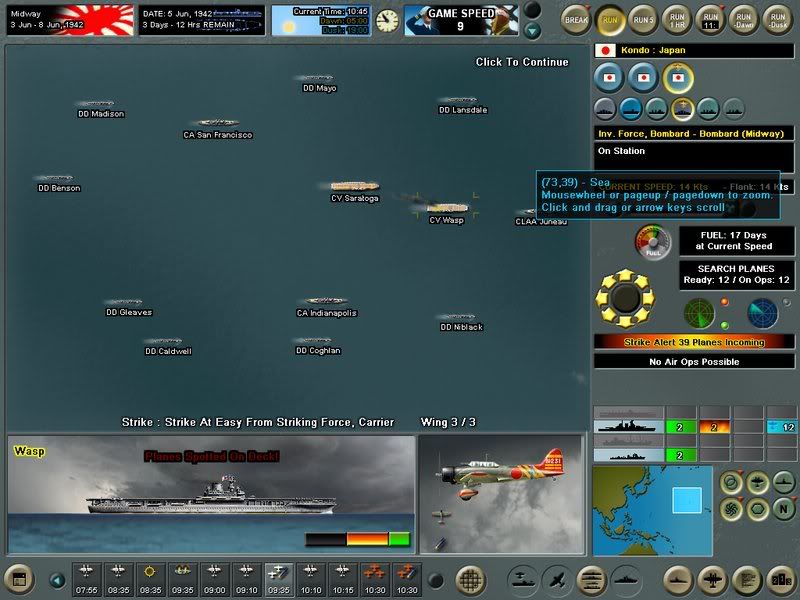
The toll, 21 planes downed, 29 damaged...but in return, 3 hits on Saratoga(presumed sunk), 1 on Hornet(burning), the CA Indianapolis also took a hit, but was still under control. Wasp and Enterprise both take 3 hits, and Yorktown takes 4, all three are presumed sunk by the Nagumo's pilots.

The Bombardment force however does not escape unscathed, by 14:45 the Mogami is sunk and all cruiser are damaged, with Suzuya on fire.
Near dusk a strike from the northern striking force reserve goes in. No American carriers are observed still afloat.
June 6
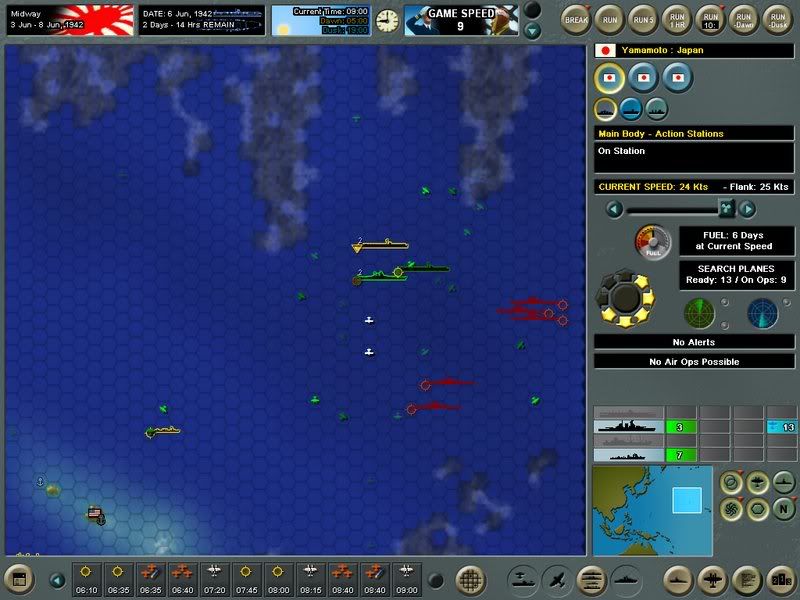
Dawn brings new sightings by the Northern force, now NNE of Midway, only 280nm from American battleships trying to flee.
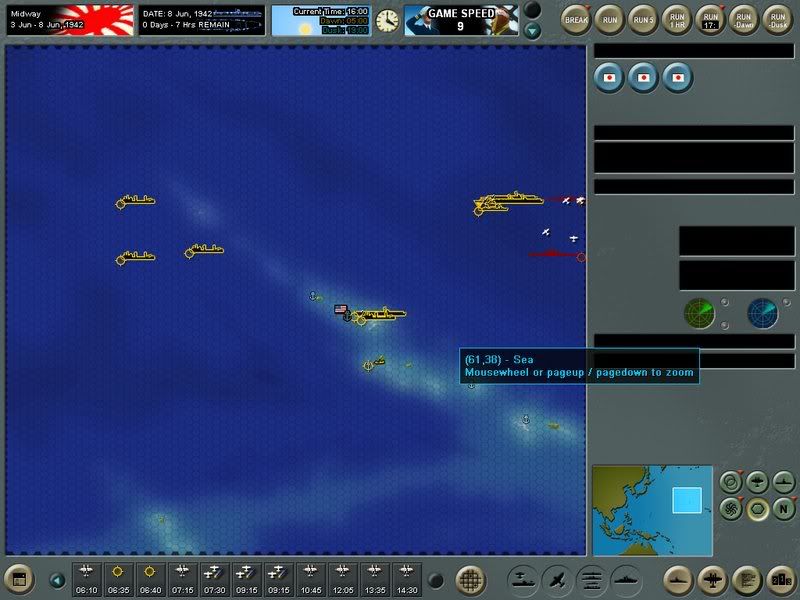
Confident that the US carriers destroyed, Nagumo launches a full strike against midway from the SE, near Raita bank to relieve the pressure from the invasion force.
14:10
A full strike by the Northern force hits home, savaging the American cruisers and destroyers.
June 7
It's all over except the cleanup. The invasion force ships have taken a mauling, but Nagumo takes his carrier striking force in to support them with fighters from his carriers. And before the day is over, Midway is denuded of fighters, and Jap marines are supported by heavy air cover.
After The Battle
Intelligence for the IJN reports 20 US ships sunk.
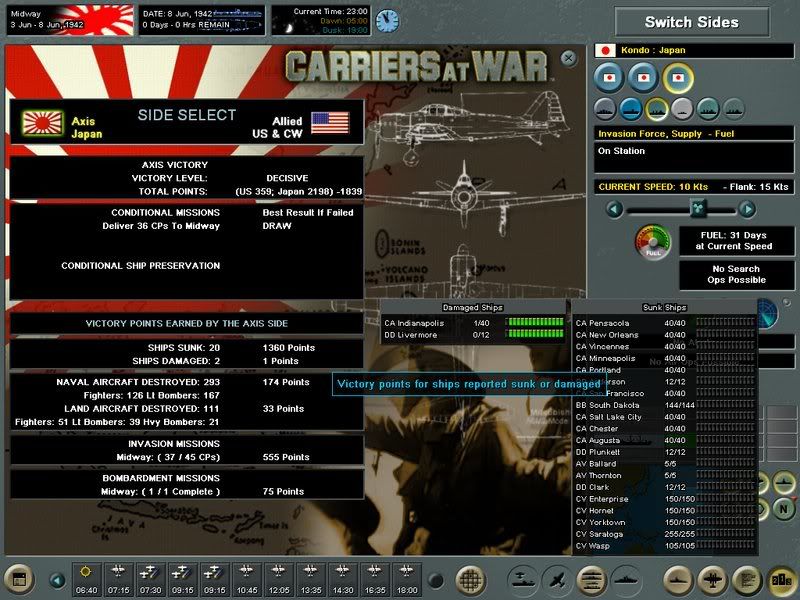
9 CA – Pensacola, New Orleans, Vincennes, Minneapolis, Portland, San Fransisco, Salt Lake City, Chester, Augusta.
3 DD – Anderson, Clark, Plunkett
1 BB – South Dakota
2 AV – Thornton and Ballard
5 CV – Enterprise, Hornet, Yorktown, Saratoga, and Wasp
They also report 293 Naval Aircraft destroyed along with 111 land aircraft
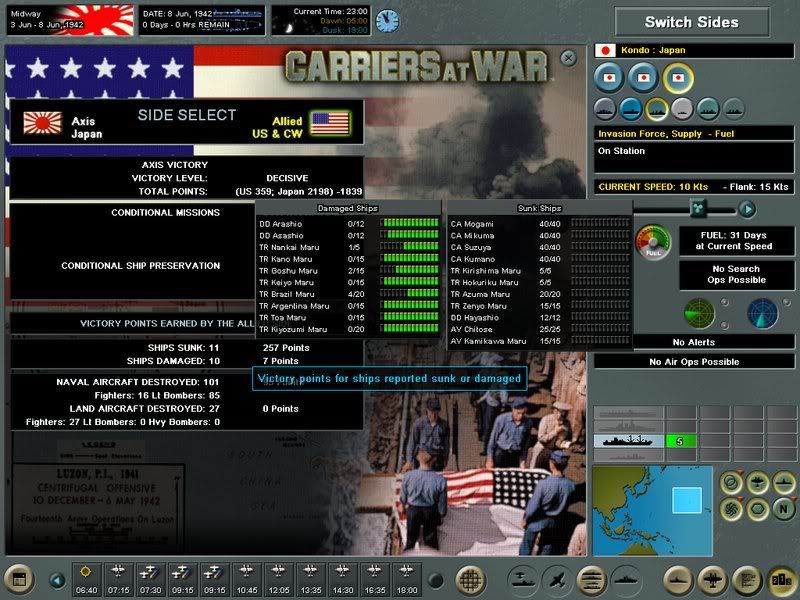
4 CA – Mogami, Mikuma, Cuzukya, Kumano
4 TR
1 DD – Hayashio
2 AV
Carrier casualties include 101 Naval Aircraft lost, most in that first disorganized strike that eliminated the US carriers.
For another 2 years, the IJN will reign supreme with air superiority over the Pacific until the Essex class carriers come on line. Nagumo, with Midway behind him, now sets his sights on Pearl, and nothing is going to stop him.
Or that's how it could have gone.
Carriers at War published by Matrix games, this naval simulation recreates the major naval battles of the Pacific theater of war, with plenty of variants and possibilities, it's enough to keep you well entertained. The above AAR was from a random Midway variant, giving the US a substantially larger carrier force than was historically present. Of course, it didn't do them that much good.
The look is very much old school, but pleasant, I'm reminded of a real time version of PTO, except on a more intimate scale. There's no production here, just your carriers and the enemy, and a whole lot of ships, bombs, and torpedoes with somebody's name on it.
The first principle of carrier warfare, is to get in the first strike, as hard as you can with as much as you can before they strike back. And that's apparent in this game, a lucky search plane can turn the tide of the battle, and don't think that all the battles come out as easy as this particular AAR. I actually played through twice, the first time forgetting to take screenshots(Doh!), the first time came out much closer, with an American carrier strike launched at my main carrier force at about the same time as I launched, leaving me with 4 of my 5 large carriers sunk, and further air operations reliant on my light carriers in the northern force.
This is a game where minutes count, and wisely they have a 5 minute count option, not to mention uninterrupted running for the long nights. So I have to say that the AI is adequate, make a mistake and let your carriers come too close without a CAP and expect to get slaughtered, because even a minor mistake that costs you a carrier can turn the battle. On the other hand, don't expect any dazzling tactics from the AI, it strikes hard, and strikes fast, but has a bit of tunnel vision, going after the enemy it can see instead of the enemy it knows should be out there.
Playability, well it's not a very steep learning curve in my opinion. The controls are very intuitive, left click to select, right to order a move, or else select an option from the dropdown menu. Your options are a bit limited by the scale, and that's good for the most part, since you don't have to worry about the minor details. In fact the best way to learn is to play through a game or two. Set your search rosettes, order about your task forces, and learn the value of cloud cover and a CAP(combat air patrol) the first time an enemy strike blasts your carriers out of the water. Or if you're lucky, you can deliberate over the difficult choice of striking as soon as you spot an enemy force, or waiting to get closer(at extended range your planes will have only a fraction of their maximum payload). To leave your planes below decks until the strike, or to arm them beforehand and leave thousands of tons of live ordnance up on your decks for an enemy strike to ignite. To send your fighters in armed with bombs or to have them fly escort. To take the time that you may not have and send them in as a cohesive strike, or let them fend for themselves, winging their way towards destruction as soon as they clear the decks? Once you send your strike off to that suspected enemy contact all you can do is hope and pray, as your brave little simulated pilots dive towards victory or death. Once there your pilots will select their own targets and report back(which can either be accurate or not depending on your options) on their suspected kills. But be warned, I've lost more than one game to an enemy carrier force that I thought sunk, so it's up to you to try and get your ships back under cover of a squall or storm while your planes rearm.
On the other hand, this abstraction and hands off approach does have a few downsides. Your surface fleet fights in much the same way, you tell your fleet elements to get closer or further away and select a main group of targets for their guns and that's it. You get a few seconds of explosions and that's it. This however, doesn't happen that often to begin with, so it might be forgiven, the only time I actually had a surface engagement was when my ships and the enemy's tried to use the same squall as cover during the night and more or less ran into each other. Other times one side or the other would usually see the odds and be able to retreat.
Also, your taskgroups are relatively fixed, you can dispatch a ship to retreat or scuttle it, but other than that you are unable to split or combine TG's. Something which is especially useful as Japan who tend to have all their carriers in a single large TG, making it very vulnerable, whereas until the late war the US nearly had a TG for every carrier, making it a bit slow to coordinate strikes. Of course, in my opinion this can be forgiven due to the creator's wish to avoid ahistorical hindsight tactics, but it still would have been a nice feature.
In addition, you'll eventually get tired of the same plane attacking random ship/plane shot down by CAP/AA, and ship showing damage(signified by a fire and estimation of its health) animations, and be ready to just see the results. So be warned that this isn't a showy game. Speaking of planes, I would have liked a little more detail on the search plane routes, the rosette is user friendly, but I wouldn't have minded being able to modify the standard search pattern or order additional planes out. And part of the abstraction is the need for your carriers to more or less stay in one place once planes are launched, I seem to recall the Japanese coordinating rendezvous points so that their carriers didn't have to remain stationary(correct me if I'm wrong however, since this is from half remembered history courses taken awhile back). So the ability to estimate and place a landing/retrieval point would have been nice.
Another thing that history doesn't exactly give us, is balance. There are playing one side or another will be decidedly easier depending on the scenario, shifting from Japan to the US respectively. Though the variants do a good job at providing alternate orders of battle(Playing as the US at Midway in the historical scenario for example or as Japan in the Philippine Sea scenarios, you realize how desperate the situation can be, outnumbered, outgunned and outpositioned, but not out of the fight). Fortunately, it ships with a very functional editor, and if you wish you could create scenarios to your heart's content.
The one thing I would have liked, is a way to tie the scenarios together in a campaign. Though I'm sure that'd be difficult given how ahistorical things can get if one side gets in a lucky strike. Imagine the US carriers wiped out at Pearl, the entire war would have changed, not just the order of battle for the next mission. So I can understand why it's presented the way it is, with the main battles(Though conspicuous in it's absence is Leyte Gulf, which is surprising, it would have been interesting to replay the harrowing trial of Taffy 3) and variant scenarios.
Now, the pricetag, at about $50 I found it a bit on the pricey side. For $50 you can get a new cutting edge, graphics out the wazoo, computer game, or an epic, down to the last faulty instrument panel on that plane sort of game, and this isn't an epic, battles usually take between half an hour to an hour if you play like I do, but it does what it needs to. Provide some real good edge of your seat tension, which is all too often missing from a strategic wargame. This feels like a beer and chips game, one that you don't have to devote a whole night playing, and it doesn't require a degree in logistics and a MENSA membership to enjoy the heck out of it.
The question however, is it worth the money when other independent games usually tend to run about twenty bucks less. Well, when I first started playing and realized the limits to my options I was almost ready to say no, but then I kept playing, and kept playing, and kept playing. I was hooked, an hour free here, an hour free there, in fact I was even dreaming about search rosettes and torpedo strikes for a few days! And now after a week or so of buying it, I'm convinced that I got my money's worth, because I know I'm going to keep on playing. I do feel that a more detail oriented grognard may be disappointed, but if you want a fun carrier game that doesn't take forever, then this is a good buy.
Thursday, March 27, 2008
How To Host A Dungeon
Recently I stumbled upon this page on Making Dungeons. Which contains rules on How To Host A Dungeon, taking one from the Primordial soup to the Age of Villainy. Since this was such a neat premise I had to play a run through. Any confusion with the rules is probably my own fault, and I know that I made some errors that if I were to have another go at it I would be able to avoid, but it turned out pretty neat. Though one thing that bothered me was that, given how I rolled in the Primordial age, there were no pockets of gold or ore for the latter ages and that really made my dungeon rather wealth poor.
Anyways, here's my notes from the playthrough, along with pictures.
In the beginning were the Drow. The initial set-up had given the dungeon an underground river, a volcano to the left side, and a set of three monster ridden caverns in the center. The caverns contained a slime, a gelatinous cube, and a troll, eventually the troll would end up as the only one alive(the others killing each other off). The Drow expanded, but due to the lack of any real resources(no gold, gems, or mithril had been rolled) there was little actual activity. They reached the surface with little fanfare, only to be wiped out by the human kingdoms, and thus ended the age of Drow. (I wasn't sure if I needed to roll a disaster or not here)
All in all, a really interesting and fun little tool. Obviously I made it in a paint program since I don't have any sketching paper, but I think it came out pretty well. It would probably be a lot easier if I did just sketch it out, since the I had to mentally grid it off to imagine where the die 'fell' by rolling to find the grid point. Also, there were some things that I felt were really neat, yet didn't get much of a chance to shine, I almost went through the whole game without a special feature showing up. Another thing was that only certain groups tunneled, others might get stuck in separate areas without access to their prey or loot source, related to this was a comment in the rules to build new rooms as necessary for the colonies, but I couldn't exactly find where it told us when it was necessary. The adventurers from the city had troubles as well since their basement never connected up to any of the main cave complexes, and conversely none of the monster groups were within their range. But as I said, it was quite interesting, just watching the evolution of my dungeon ecology was really neat, and it's definitely giving me ideas for the next cavern complex any stalwart(or stupid) band of adventurers might run through.
Anyways, head over there and check it out, for a fun little solo game or a useful DM's tool, whichever your pick.
Anyways, here's my notes from the playthrough, along with pictures.
In the beginning were the Drow. The initial set-up had given the dungeon an underground river, a volcano to the left side, and a set of three monster ridden caverns in the center. The caverns contained a slime, a gelatinous cube, and a troll, eventually the troll would end up as the only one alive(the others killing each other off). The Drow expanded, but due to the lack of any real resources(no gold, gems, or mithril had been rolled) there was little actual activity. They reached the surface with little fanfare, only to be wiped out by the human kingdoms, and thus ended the age of Drow. (I wasn't sure if I needed to roll a disaster or not here)
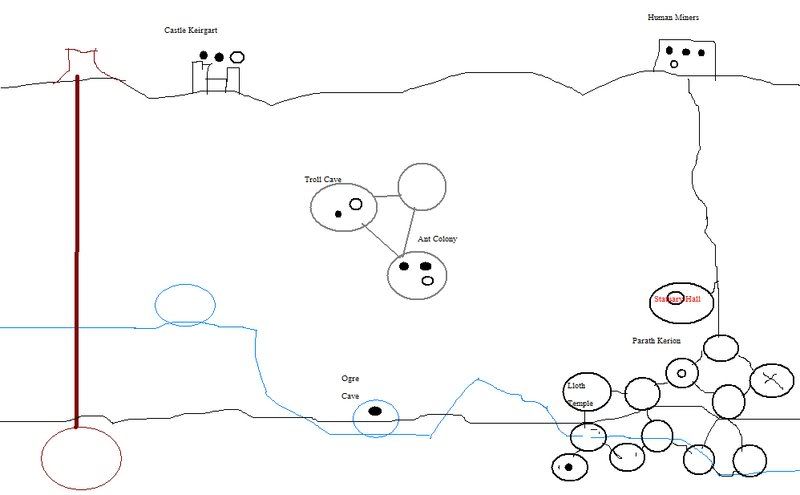
A castle is founded in the west and begin farming, in the east a set of human miners stumble upon the old drow shaft and begin to shore it up. In the old monster caverns an ant colony takes root and begins to breed. Finally, in a natural cavern formed by the underground river a ogre takes up residence, but soon must depart to search for food.
Year two is much the same. More farms for the castle, the miners dig deeper, the ants breed and send out a tunnel to the east. The Ogre eats whatever was left over in the Drow dungeons, and a Xorn arrives in a empty natural cave near the river.
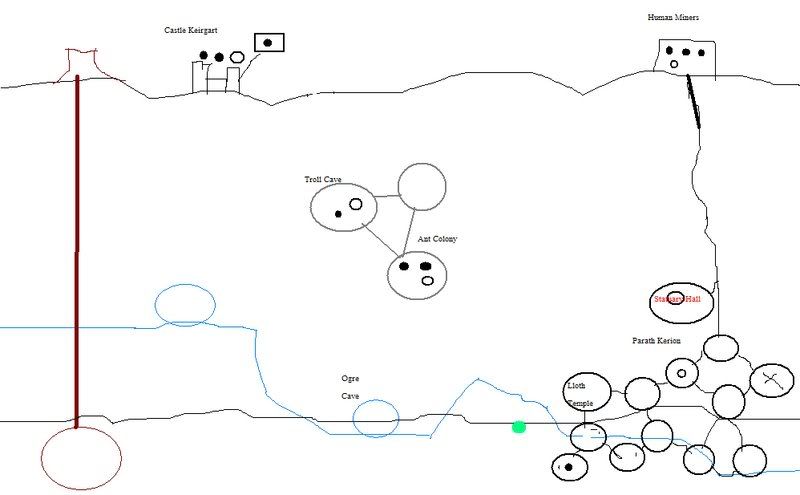
Year three begins with Gnolls taking up residence near the old Drow Statuary hall. The castle inhabitants continue to breed and the miners continue along the old drow shaft. The ants breed, the ogre consumes its own loot, and the Xorn wanders. (It was rather far from any other caverns or rooms so I didn't know if the rules meant for it to be lost in the tunnels or establish another cavern where it ended up as it headed towards food. I assumed it just stayed in the tunnel).

Year four. Things get interesting. A group of 4 Lawful adventurers decide to brave the caverns, of course the only accessible area is the Mining camp.(The rules don't state whether the human miners are lawful or chaotic, but I assumed that they'd be lawful, also, the rules of the adventuring group don't specify how far they can move each turn. Do they go until they run out of people or finish their mission? That's what I assumed for this play. Again, no option for if the group hasn't encountered any others, they can't exactly send the adventurers off on a quest to fight nothing). The adventurers eliminate the fledgling gnoll colony, and fight the ogre to a standstill, unfortunately it seems that the xorn are too much of a challenge, their bones and treasure mark the spot(I created a cavern at the spot to mark their last hurrah, otherwise I don't really know where I would have put the treasure, my earlier decision to leave the xorn just sitting in the tunnel comes back to haunt me.) After the fall of the adventurers, the city builds some dungeons, the minders dig deeper, the ants end up at their maximum breeding capacity, the ogre finds treasure, and the xorn eats some treasure.
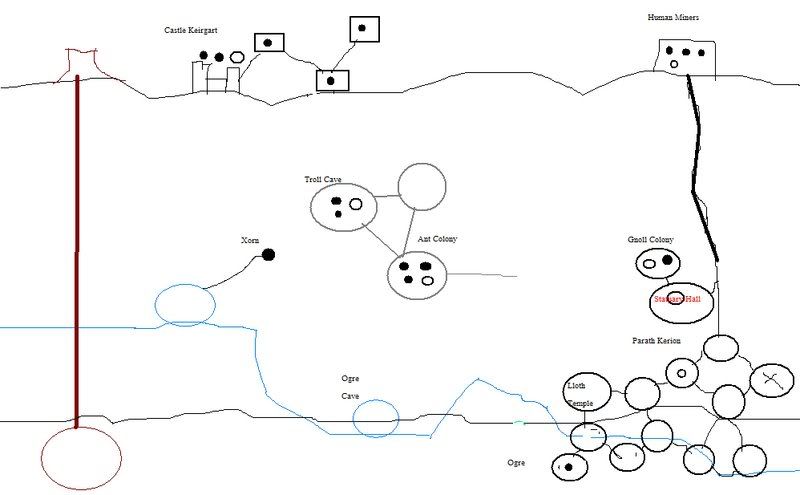
Year Five. Another adventure group arrives, this time 4 chaotic adventurers(my die seemed to like 6 this turn). The human miners are all eliminated with the loss of a single adventurer(again, both rolled 6's). But when the ogre is encountered, they're massacred. The castle is also able to send a group of adventurers down into the depths, hurrah! They find nothing and thus return to found a city instead. The Ant colony comes into conflict with the Xorn, since they can't bribe, instead they handily loot its treasure. The Xorn are then pushed back. The Ogre loots the last of the Drow treasures.
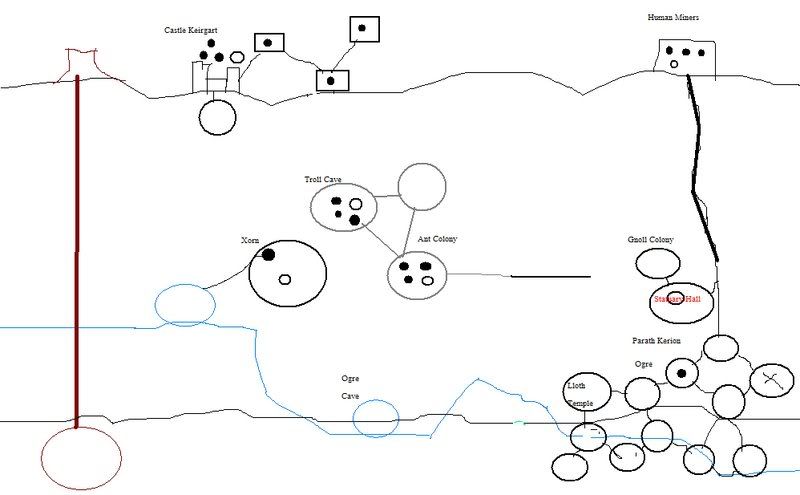
Year Six. Wandering monsters arrive! A Giant Spider, a Gelatinous Cube(affectionately labeled as Jelly Cube), and a Roper enter into the fray. The humans breed. The ants breed and steal the roper's loot. The Xorn then kills the Roper and takes over its lair. The ogre then eats the giant spider. Jelly survives deep in the underdark and does nothing.
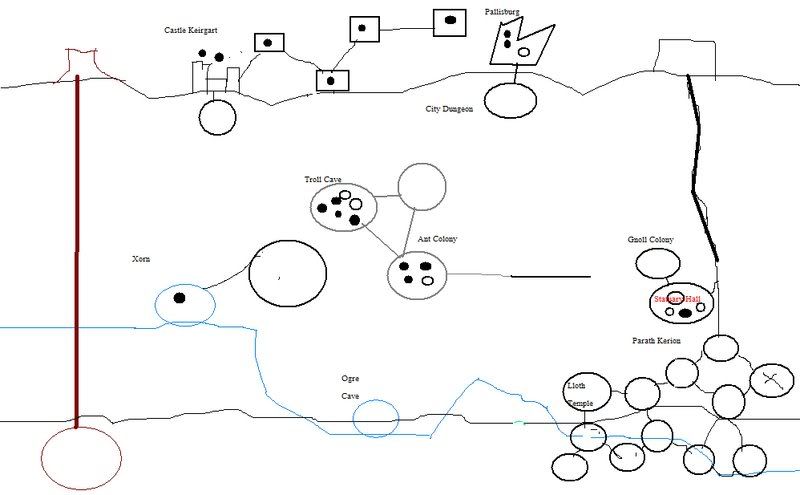
Year Seven. Three lawful adventurers enter the dungeons. They kill the ogre handily and take its loot. They kill Jelly, it has no loot. They kill the Xorn, it has no loot. Amazingly successful adventuring party, they return to the surface with their loot! Two of the loot disappear into the heroes pockets, and two go to the improvement of the city and castle. The city sends a group to adventure as well....which returns empty handed after clearing the dungeons of rats. But they do found a wizard's tower(pyramid). The ants breed....everything else has been wiped out by adventurers.
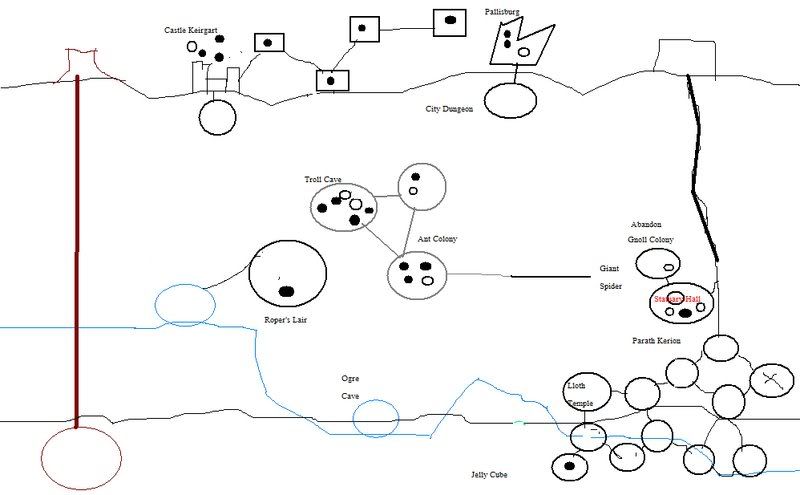
Year 8. The Statuary hall and environs have a new special feature. They're now haunted by the ghost of the Ogre that was slain last year...or at least that's what I think. The Castlegoers again send down an expedition....which brings back nothing, but does found a new university, and ushers in the age of villainy.
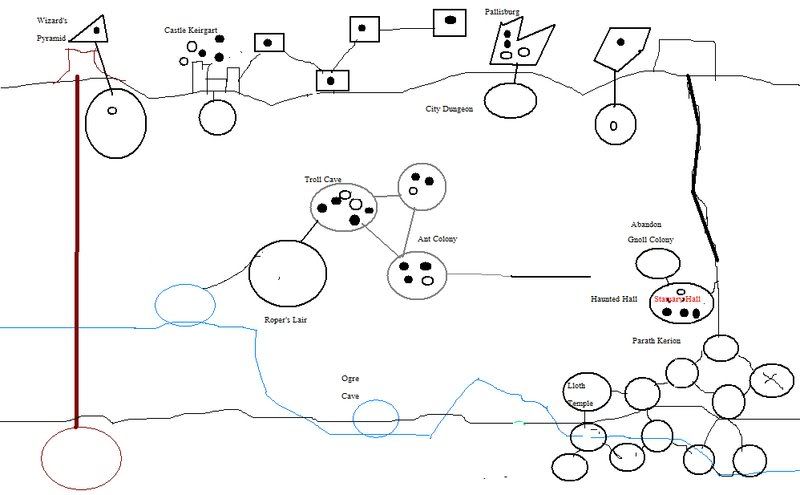
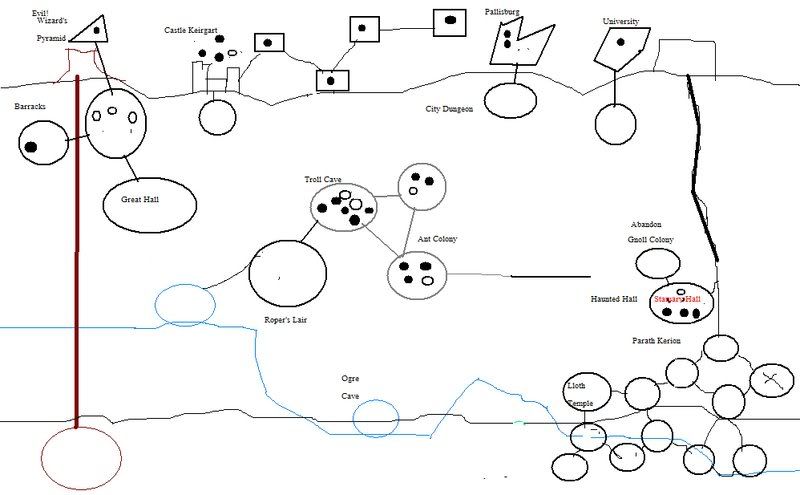
Twisted by researches into things that MAN WAS NOT MEANT TO KNOW(pyramid power?). The occupant of the Wizard's Tower(pyramid) begins to cackle, the Dungeon Master has arrived. Expanding into the depths, he builds himself a nice hall, recruits minions and builds a barracks for them. The ants and humans breed. Adventurers arrive and due to the Dungeon Master's minions being inept and incompetent(rolling 1's does not help the cause, I can only imagine that the DM stepped into his own vat of shark filled acid), quickly dispatch the villain. And thus ends the age of villainy.
All in all, a really interesting and fun little tool. Obviously I made it in a paint program since I don't have any sketching paper, but I think it came out pretty well. It would probably be a lot easier if I did just sketch it out, since the I had to mentally grid it off to imagine where the die 'fell' by rolling to find the grid point. Also, there were some things that I felt were really neat, yet didn't get much of a chance to shine, I almost went through the whole game without a special feature showing up. Another thing was that only certain groups tunneled, others might get stuck in separate areas without access to their prey or loot source, related to this was a comment in the rules to build new rooms as necessary for the colonies, but I couldn't exactly find where it told us when it was necessary. The adventurers from the city had troubles as well since their basement never connected up to any of the main cave complexes, and conversely none of the monster groups were within their range. But as I said, it was quite interesting, just watching the evolution of my dungeon ecology was really neat, and it's definitely giving me ideas for the next cavern complex any stalwart(or stupid) band of adventurers might run through.
Anyways, head over there and check it out, for a fun little solo game or a useful DM's tool, whichever your pick.
Thursday, January 10, 2008
Chain Reaction 2.0
Over the New Years holiday I was finally able to get a victi....errr, I mean volunteer to play out a game using the Chain Reaction 2.0 rules from Two Hour Wargames. I've heard nothing but praise for them and really wanted to give them a try, plus of course the added bonus of them offering it for the best price imaginable, free!
I took the blue forces and my friend D, who may or may not enter in their own version of the story took the red forces. Both sides represented by board game pieces since, it was too much effort to dig around for anything more suitable at the moment.
We set up some makeshift terrain, the major features including a Church with a fence on the eastern side of the play area, a low wall along the north, cars and a store on the west, and a town's clock tower in the center.
In hindsight it probably would have been better to play one of the premade scenarios that they give out, instead of jumping right in, but that'll be something for next time. We both rolled up forces for our battle, the setting being rival gang warfare. One of the main lures of the Two Hour Wargame product line is, well, as advertised, all their games should be playable in 2 hours or less. Well we spent a good part of that time looking through the rules and rolling up weapons and characters(they had a nice table for rolling up your force, though for the gang army set under weapons it had "varies")
I winged it on the weapons, and we ended up with each side having a LMG, two Carbines, two Machine Pistols, Two regular pistols, and one BA Pistol(As well as 1 grenade each, though neither of us got a chance to use it). Again, probably should have started less ambitious than 8 characters per side, but that's how it went down. With my forces entering from the south and his from the north

I split my blue forces into two groups, initially I intended the western group under the 2nd in command to occupy the Tower and provide covering fire. Unfortunately I mistakenly put my pistol men with the LMG equipped 2nd in command. So they advanced up to the tower while my main force tried to flank the red forces by going around the east of the Church.
Advancing into position
The Red force had little actual movement, as even alone my LMG was successfully forcing most of them to hold their position at the low wall, although they did attempt to send their carbine equipped soldiers to occupy the Tower, they were repulsed, with one falling.(Where it would remain for the rest of the battle, out in the open field beyond hope of rescue). My own fortunes took a turn for the worse as a lucky shot by their leader took out my LMG man, which forces me to abort my flanking maneuver in favor of sending my own carbines up into the church.
The Opening Moves
The Red force attempts to take my strongpoint at the church, and is repulsed, some lucky shots by my carbine men keep their LMG equipped soldier from providing much support. They do however sneak a man forward to the cars, where a fierce exchange of pistol fire erupts, and gets nowhere fast(their low impact meant that at best there were a lot of grazing wounds).
Midgame
After Red's disastrous attempt at taking the church I returned the favor, charging at their downed men in the open. No mercy or quarter was given as the Blue forces sliced their throats. Unfortunately both sides got bogged down with the low wall separating them, this is where both leaders bit the dust as we tried out the melee rules. After that they were able to sneak a man into a church, and a brief firefight among the pews erupted, I emerged victorious, with D's man running away in a panic, but it was a pyrric victory. Their LMG leader was back up and my carbine man was having a hard time keeping them from coming forward. On the other hand, near the end I was able to revive my own LMG soldier.
Endgame
We decided to call it a draw, each with only three characters in play, and having lost a leader. All in all it took about 4 hours to get that far, though admittedly it took about an hour of set-up time.
Lessons Learned:
Height is power, in not pressing hard for the church, D had very limited movement options, if not for lucky rolls when I tried to force the wall, they'd have been in a world of hurt, I think it was a double six for my soak roll that left my leader lying in a puddle of blood before he could get the grenade off.
Moving in the open is bad. Both of our assaults stalled due to trying to force the issue moving through the open. And his poor soldier that got taken out in the second or third turn attempting to reach the tower was still lying there by the end of the game.
Don't Go it Alone. The activation system being such that those with a leader, or those with a high rep are more likely to move, splitting up is a bad idea. The western front was surprisingly quiet as turn after turn passed where neither side could move, and when they did a pistol battle would quickly have them ducking back to cover.
Thoughts:
Overall, it was a very fun game, though it had started dragging at the end. The rules were indeed easy to understand, although in practice it was a bit hard to recall everything that applied. Again, I think that if we had played one of the beginner scenarios things might have been better. Since it was free, I can't really give much complaint, though there could have been a table to roll for weapons. The other thing was that it was, well, rather hard to actually kill someone, perhaps it was simply due to the fact that we were using very low impact weapons, but about 80% of the time the character hit would be back on its feet the next turn, or else once someone tended their wounds. The duck back and "in sight" rules really made sure to punish our stupid decisions, some more so than others. It's definitely a game system that I'd like to revisit, even though it didn't live up to the advertising about being only 2 hours.
I took the blue forces and my friend D, who may or may not enter in their own version of the story took the red forces. Both sides represented by board game pieces since, it was too much effort to dig around for anything more suitable at the moment.
We set up some makeshift terrain, the major features including a Church with a fence on the eastern side of the play area, a low wall along the north, cars and a store on the west, and a town's clock tower in the center.
In hindsight it probably would have been better to play one of the premade scenarios that they give out, instead of jumping right in, but that'll be something for next time. We both rolled up forces for our battle, the setting being rival gang warfare. One of the main lures of the Two Hour Wargame product line is, well, as advertised, all their games should be playable in 2 hours or less. Well we spent a good part of that time looking through the rules and rolling up weapons and characters(they had a nice table for rolling up your force, though for the gang army set under weapons it had "varies")
I winged it on the weapons, and we ended up with each side having a LMG, two Carbines, two Machine Pistols, Two regular pistols, and one BA Pistol(As well as 1 grenade each, though neither of us got a chance to use it). Again, probably should have started less ambitious than 8 characters per side, but that's how it went down. With my forces entering from the south and his from the north

I split my blue forces into two groups, initially I intended the western group under the 2nd in command to occupy the Tower and provide covering fire. Unfortunately I mistakenly put my pistol men with the LMG equipped 2nd in command. So they advanced up to the tower while my main force tried to flank the red forces by going around the east of the Church.
Advancing into position
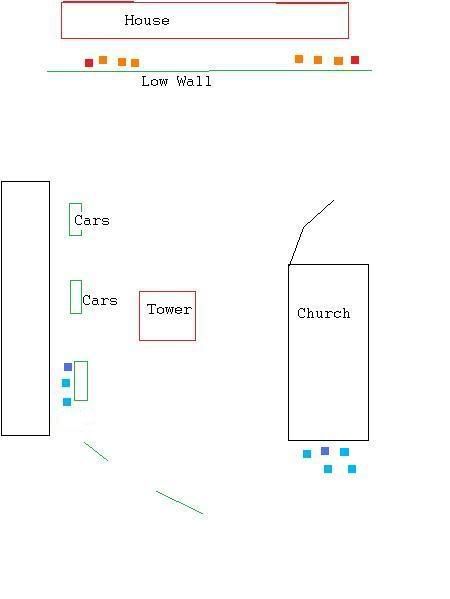
The Red force had little actual movement, as even alone my LMG was successfully forcing most of them to hold their position at the low wall, although they did attempt to send their carbine equipped soldiers to occupy the Tower, they were repulsed, with one falling.(Where it would remain for the rest of the battle, out in the open field beyond hope of rescue). My own fortunes took a turn for the worse as a lucky shot by their leader took out my LMG man, which forces me to abort my flanking maneuver in favor of sending my own carbines up into the church.
The Opening Moves
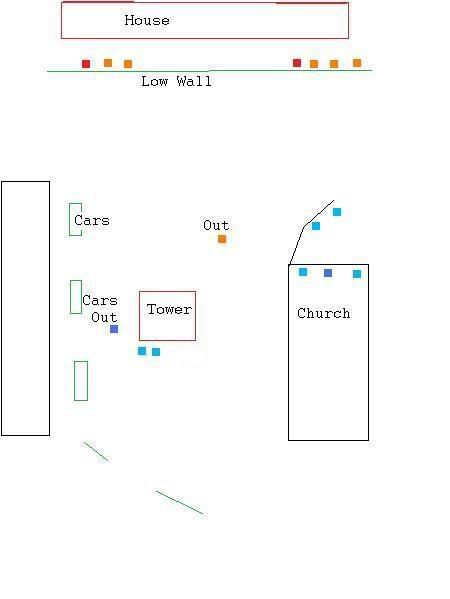
The Red force attempts to take my strongpoint at the church, and is repulsed, some lucky shots by my carbine men keep their LMG equipped soldier from providing much support. They do however sneak a man forward to the cars, where a fierce exchange of pistol fire erupts, and gets nowhere fast(their low impact meant that at best there were a lot of grazing wounds).
Midgame
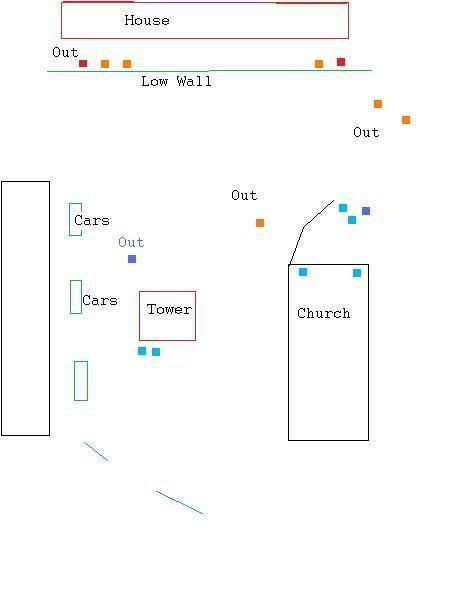
After Red's disastrous attempt at taking the church I returned the favor, charging at their downed men in the open. No mercy or quarter was given as the Blue forces sliced their throats. Unfortunately both sides got bogged down with the low wall separating them, this is where both leaders bit the dust as we tried out the melee rules. After that they were able to sneak a man into a church, and a brief firefight among the pews erupted, I emerged victorious, with D's man running away in a panic, but it was a pyrric victory. Their LMG leader was back up and my carbine man was having a hard time keeping them from coming forward. On the other hand, near the end I was able to revive my own LMG soldier.
Endgame
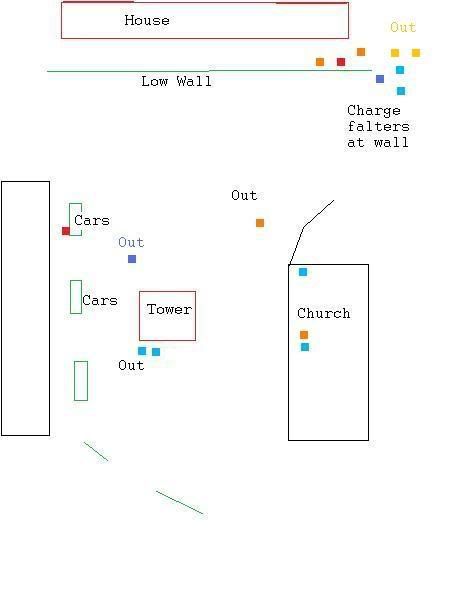
We decided to call it a draw, each with only three characters in play, and having lost a leader. All in all it took about 4 hours to get that far, though admittedly it took about an hour of set-up time.
Lessons Learned:
Height is power, in not pressing hard for the church, D had very limited movement options, if not for lucky rolls when I tried to force the wall, they'd have been in a world of hurt, I think it was a double six for my soak roll that left my leader lying in a puddle of blood before he could get the grenade off.
Moving in the open is bad. Both of our assaults stalled due to trying to force the issue moving through the open. And his poor soldier that got taken out in the second or third turn attempting to reach the tower was still lying there by the end of the game.
Don't Go it Alone. The activation system being such that those with a leader, or those with a high rep are more likely to move, splitting up is a bad idea. The western front was surprisingly quiet as turn after turn passed where neither side could move, and when they did a pistol battle would quickly have them ducking back to cover.
Thoughts:
Overall, it was a very fun game, though it had started dragging at the end. The rules were indeed easy to understand, although in practice it was a bit hard to recall everything that applied. Again, I think that if we had played one of the beginner scenarios things might have been better. Since it was free, I can't really give much complaint, though there could have been a table to roll for weapons. The other thing was that it was, well, rather hard to actually kill someone, perhaps it was simply due to the fact that we were using very low impact weapons, but about 80% of the time the character hit would be back on its feet the next turn, or else once someone tended their wounds. The duck back and "in sight" rules really made sure to punish our stupid decisions, some more so than others. It's definitely a game system that I'd like to revisit, even though it didn't live up to the advertising about being only 2 hours.
Subscribe to:
Posts (Atom)